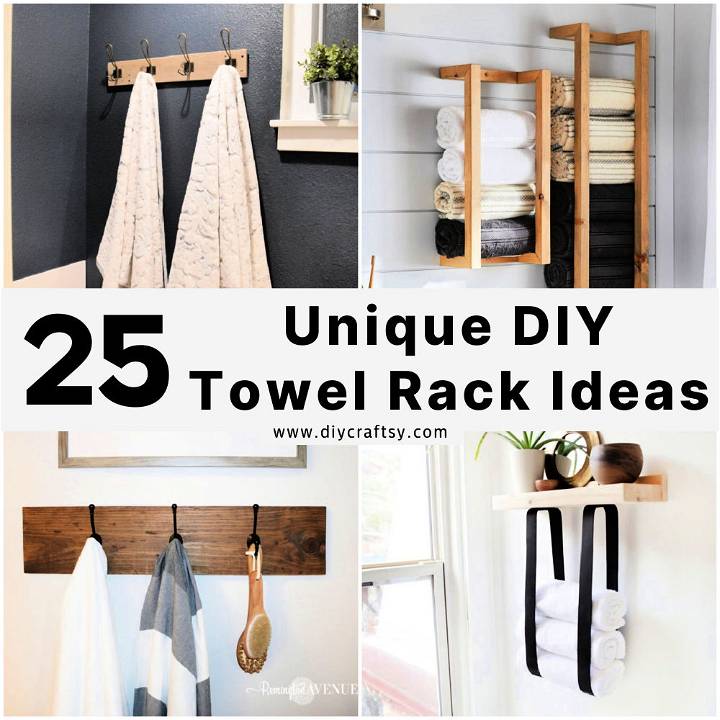
Looking to refresh your bathroom with a touch of personal style and practicality? Making a DIY towel rack not only injects your space with uniqueness but also serves a functional purpose. With 25 unique DIY towel rack ideas, you’ll find inspiration to make a piece that reflects your taste and meets your needs. The journey to adding a charming element to your bathroom starts here, where simplicity and creativity converge to transform ordinary materials into something special.
As we delve into the reasons behind crafting your own towel rack, followed by a comprehensive guide on how to do it, you’ll be equipped with the knowledge to bring your vision to life. From selecting the perfect style to gathering the necessary materials and executing your project step by step, every stage is designed to ensure your success. Ready to take on a rewarding DIY towel rack project that not only adds functionality to your bathroom but also showcases your personality? Let’s explore DIY towel rack ideas together in the sections that follow.
Why Make Your Own Towel Rack?
Making your own towel rack comes with several benefits that can enhance your home’s functionality and aesthetic appeal. Here’s why you might consider taking on such a project:
- Personalization: Tailor your towel rack to fit the exact dimensions and style of your space. Whether you need a small rack for a cozy bathroom or a larger one for poolside towels, DIY allows for perfect customization.
- Cost-Effective: Often, making your own towel rack is cheaper than buying a pre-made one. You can repurpose materials you already have or choose affordable supplies, saving money while achieving a high-end look.
- Eco-Friendly: DIY projects give you the opportunity to upcycle materials. Using reclaimed wood, an old leather belt, or surplus metal can breathe new life into what might otherwise be waste, reducing your carbon footprint.
- Satisfaction: There’s a unique satisfaction that comes from making something with your own hands. Completing a towel rack project can give you a sense of accomplishment and a personal connection to your home decor.
- Flexibility: When you make your own towel rack, you can easily adjust the size, style, or materials based on your needs or preferences, which is often not possible with store-bought options.
- Unique Decor: A handmade towel rack can serve as a statement piece in your bathroom, pool area, or kitchen, adding character and charm that off-the-shelf products can’t match.
By considering these benefits, you can see how making a DIY towel rack can be a rewarding project that enhances your home in multiple ways.
How to Make a Stylish and Functional DIY Towel Rack
Making your own towel rack is not just a way to save money, but also a wonderful opportunity to add a personalized touch to your bathroom. With a few materials and a bit of creativity, you can design a towel rack that complements your space perfectly. Here’s a simple guide to get you started.
Choosing Your Style
Before you dive into the project, consider the style and functionality you desire. Do you prefer a rustic look, or is a modern aesthetic more your style? Your choice will influence the materials and design of your DIY towel rack. Whether you’re drawn to the warmth of reclaimed wood or the sleek appeal of metal, there’s a DIY option for every taste.
Gathering Materials
Most DIY towel rack projects require basic materials that you may already have at home or can easily find at a local hardware store. Here’s a simple list to get you started:
- Wood or Metal Rods: Depending on your chosen style, these will form the main structure of your rack.
- Brackets: To securely mount your towel rack to the wall.
- Screws and Wall Anchors: Ensure they are suitable for your wall type.
- Paint or Stain (optional): To customize the color of your towel rack.
Step-by-Step Guide
1. Measure Your Space
Start by measuring the space where you plan to hang your towel rack. This will help you determine the ideal length for your rod and ensure the finished product fits perfectly.
2. Prepare Your Materials
If you’re using wood, cut it to your desired length, and sand the edges for a smooth finish. For a metal rod, you may need a hacksaw to size it correctly. Remember to wear protective gear if you’re working with metal.
3. Finish Your Rod
If you wish to paint or stain your rod, now is the time. Apply your chosen finish according to the product instructions and let it dry completely.
4. Attach the Brackets
Mark where you want to place the brackets on your wall, ensuring they are level. Drill holes and insert wall anchors if necessary. Secure the brackets in place with screws.
5. Mount Your Rod
Place your rod onto the brackets. If your design requires it, you may need to secure the rod to the brackets with screws or adhesive.
Tips for Success
- Double-check your measurements before cutting or drilling to avoid any mistakes.
- Consider the weight of the towels you plan to hang. Ensure your materials and wall anchors are sturdy enough to support them.
- Get creative with your materials. Upcycling items like an old ladder or pipes can add character to your bathroom.
Final Thoughts
Making a DIY towel rack is a simple yet impactful project that can enhance the look and functionality of your bathroom. With a little effort and creativity, you can design a piece that’s both useful and uniquely yours.
DIY Towel Rack FAQs
Making a DIY towel rack can add a personal touch and functionality to your bathroom. Here are answers to some frequently asked questions to help you get started on your project.
What materials do I need to make a DIY towel rack?
The materials you need will depend on the style and design of your towel rack. Common materials include:
- Wood or metal rods for the main structure
- Brackets for mounting
- Screws and wall anchors suitable for your wall type
- Paint or stain (optional) for customization
How do I choose the right style for my DIY towel rack?
Consider the overall aesthetic of your bathroom and your personal preferences. If your bathroom has a modern look, a sleek metal or lucite towel rack might fit well. For a rustic or farmhouse style bathroom, a wooden or pallet towel rack could be more appropriate.
Can I make a towel rack if I’m not very experienced with DIY projects?
Yes! Many towel rack projects are suitable for beginners and don’t require advanced tools or skills. Start with a simple design and follow step-by-step guides to ensure success.
How do I make sure my towel rack is mounted securely?
It’s crucial to use the right type of wall anchors for your wall material (drywall, plaster, or tile) and to ensure the brackets are level when mounted. Double-check the weight capacity of your anchors and brackets to ensure they can support the weight of the towels.
How can I personalize my towel rack?
There are many ways to personalize your towel rack, including:
- Choosing unique materials, such as repurposed wood or industrial pipes
- Adding decorative elements like knobs or hooks
- Customizing the finish with paint, stain, or decorative techniques
How can I make my towel rack eco-friendly?
Consider using upcycled or reclaimed materials for your towel rack. Old wood, metal pipes, or even belts can be repurposed into beautiful and functional towel racks, reducing waste and adding character to your space.
How do I maintain my DIY towel rack?
The maintenance will depend on the materials you’ve used. For wood towel racks, you may need to reapply a protective finish or paint occasionally. Metal racks might require cleaning to prevent rust or tarnish, depending on the type of metal used.
By answering these common questions, you’ll be better prepared to embark on your DIY towel rack project, adding a unique and useful feature to your bathroom.
25 Unique DIY Towel Rack Ideas for Your Bathroom
Discover 25 creative DIY towel rack ideas to enhance your bathroom decor. Find unique and stylish solutions for organizing towels in your space.
1. How to Make a Towel Holder
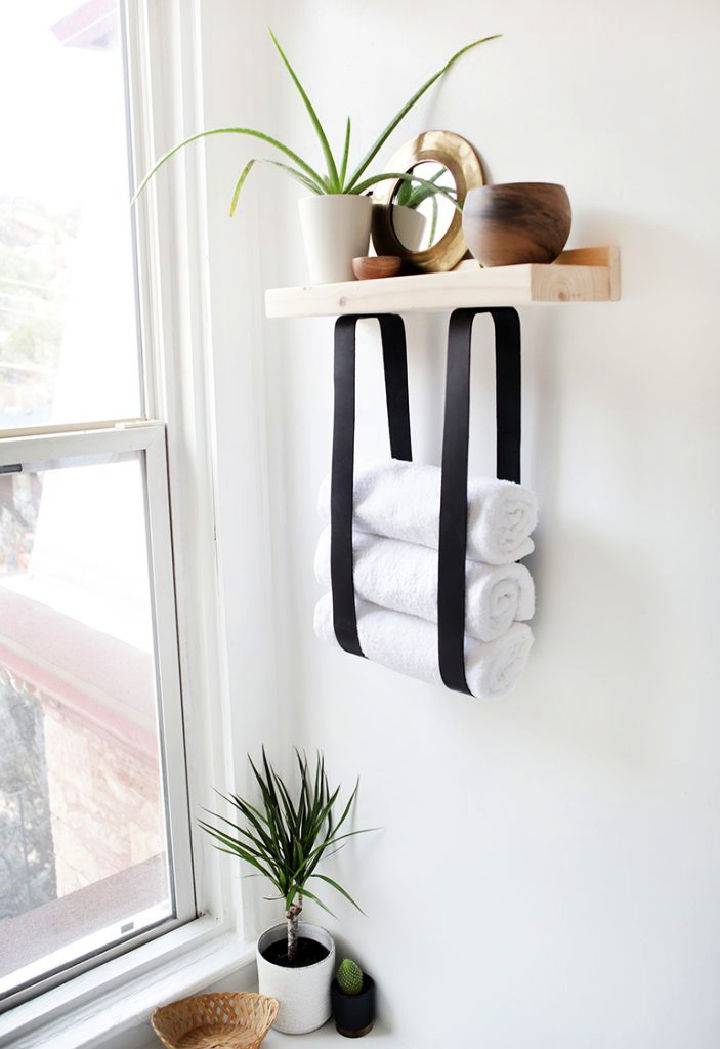
Elevate your bathroom’s style and functionality with this stylish DIY Wood and Leather Towel Shelf. Perfect for maximizing space in smaller bathrooms, it offers a chic spot for displaying decor items or storing towels. With simple materials like wood and leather, plus basic tools like a drill and a leather punch, you can bring this project to life. For a detailed step-by-step guide on making this minimalist yet practical towel shelf, visit The Merrythought. Transform your bathroom with this elegant storage solution today!
2. Making a Lucite Towel Bar
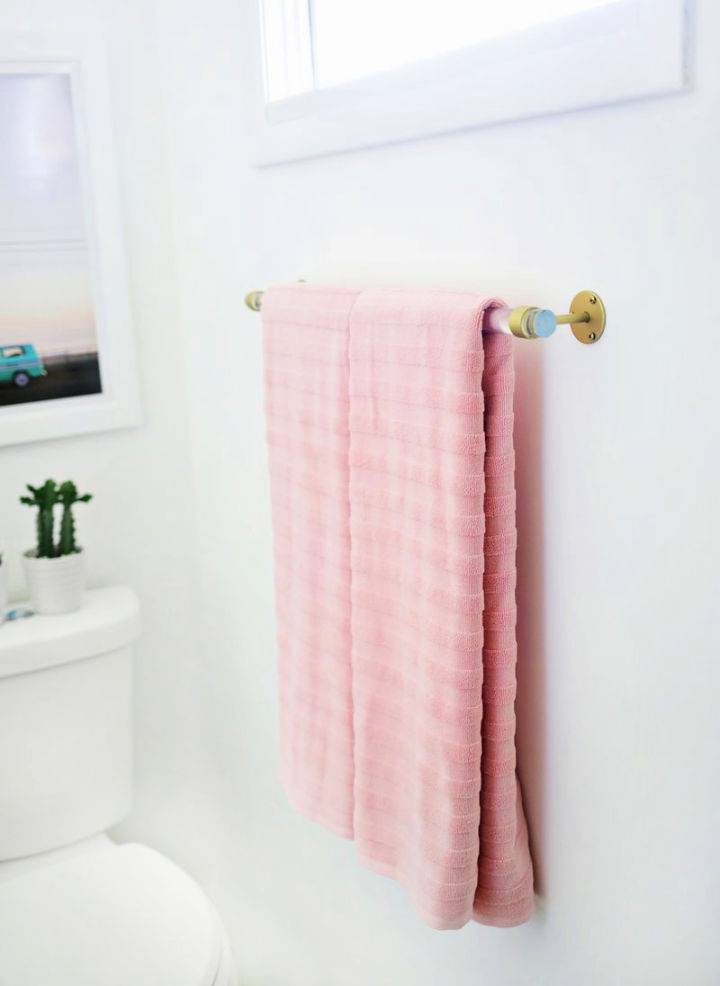
Revamp your bathroom with a chic and easy Lucite Towel Bar DIY! Embrace the sleek comeback of lucite in home décor without breaking the bank. Follow this straightforward guide for a lucite and gold towel bar that adds a touch of elegance and coolness to any space.
With simple supplies like a clear acrylic rod, ceiling brackets, gold spray paint, and a few tools, you can bring this stylish project to life in no time. Perfect for adding a polished look to your guest bathroom or any room in need of a modern upgrade. Learn how to make your own with the step-by-step tutorial at A Beautiful Mess.
3. How to Make a Towel Holder
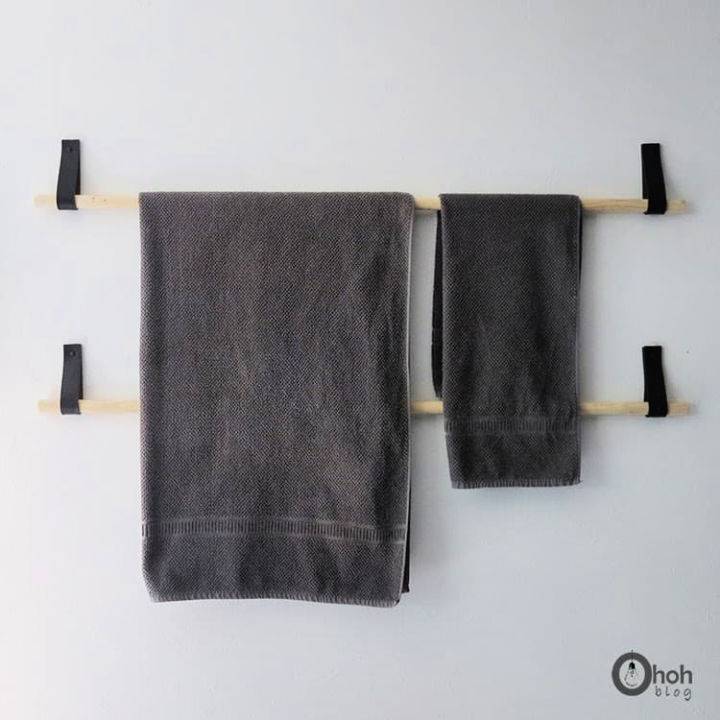
Upgrading your bathroom storage has never been easier or more stylish with this eco-friendly DIY towel holder idea. Inspired by a creative solution found on ohohdeco, you can repurpose an old leather belt and a couple of wooden dowels to make a unique space to hang your towels. It’s not only budget-friendly but also a smart way to reduce waste. This project requires minimal materials such as a drill, screws, and, of course, some DIY enthusiasm. Ready to give it a go? Your bathroom will thank you for the added charm and functionality!
4. Easy DIY Peg Towel Rack
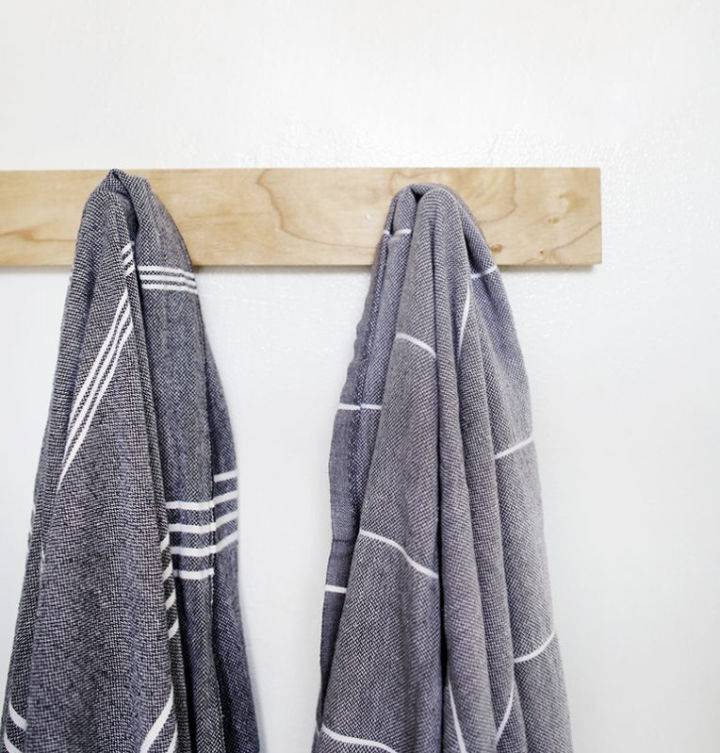
Elevate your bathroom aesthetic with a minimalist, yet functional DIY Peg Towel Rack. Transforming chaos into harmony, this easy-to-follow project from The Merrythought lets you repurpose scrap wood into something both beautiful and useful. With just a few materials—a length of wood, dowel pieces, and common tools—you can replace mismatched bathroom accessories with your own handcrafted design. Dive into the guide for a quick and rewarding makeover. Perfect for updating your space effortlessly!
5. Make a Metal Poolside Towel Rack
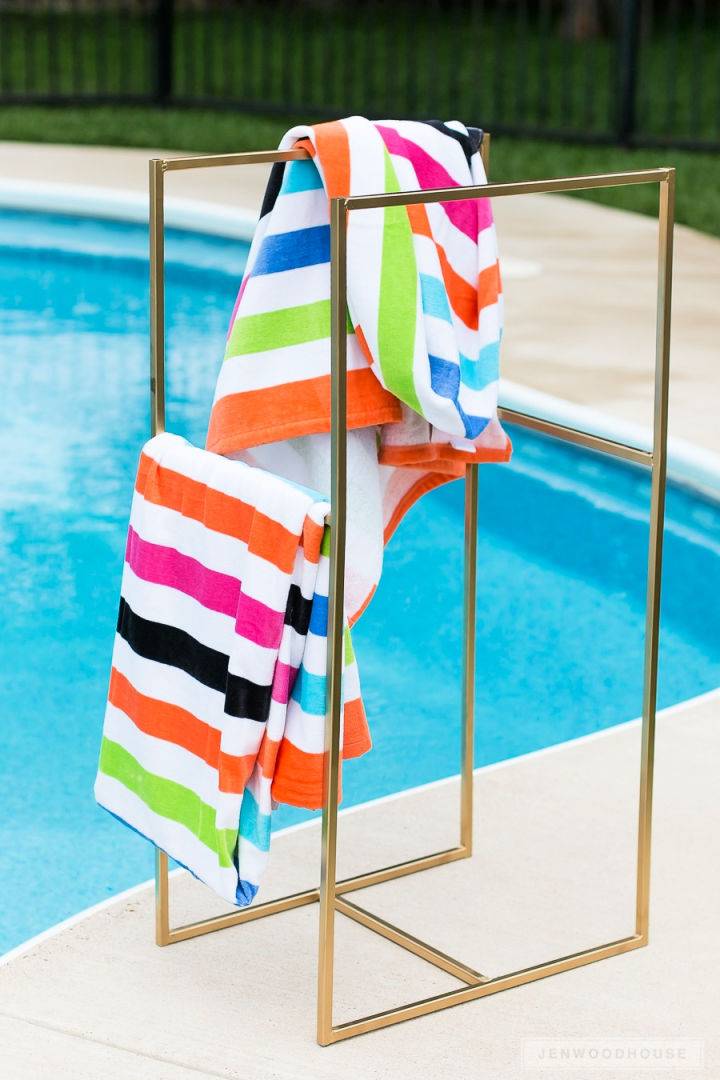
Discover a delightful way to keep your pool area tidy with a stylish DIY Metal Poolside Towel Rack. This project combines the sleekness of metal with practical function, ensuring your beach towels are always within easy reach. Jen Woodhouse guides you through this engaging and approachable undertaking. From welding with a blowtorch to achieving the perfect brazing, each step is detailed for an enjoyable crafting experience. Ideal for enhancing your poolside setup while indulging in some creative DIY.
6. Make Your Own Towel Holder
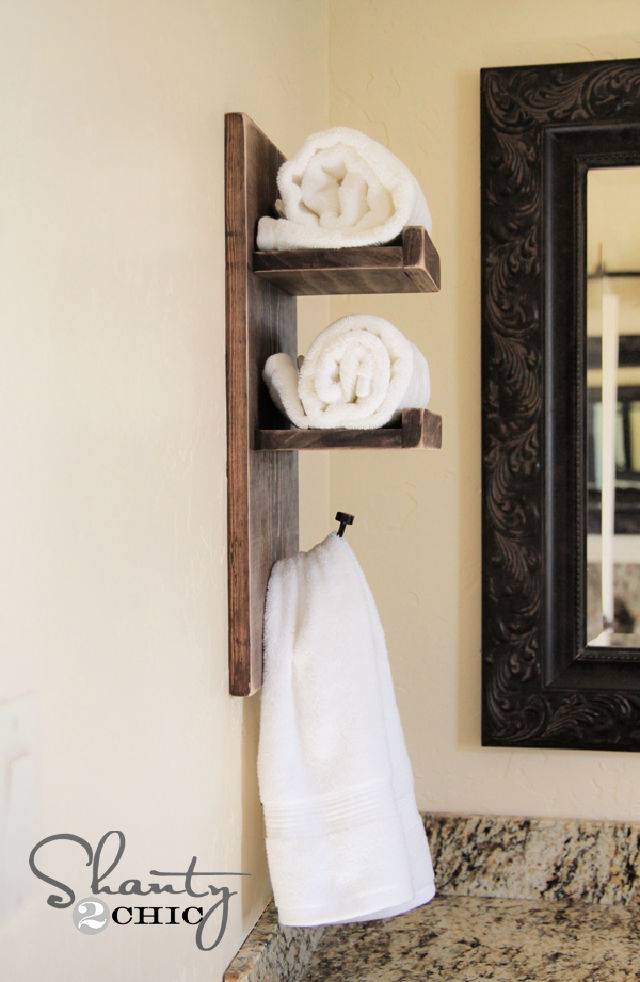
Elevate your home’s functionality and charm with this Super Cute DIY Towel Holder project! Perfect for those seeking to tidy their spaces without breaking the bank, this guide walks you through making stylish towel holders for under $10. It’s an excellent project for DIY enthusiasts looking to utilize their tools or even those new to crafting. For a clear, step-by-step guide, complete with supply lists and helpful tips, click here: Shanty 2 Chic. Get ready to enhance your bathroom or kitchen with these handy, homemade additions!
7. Homemade Towel Rack With Peel and Stick Planks
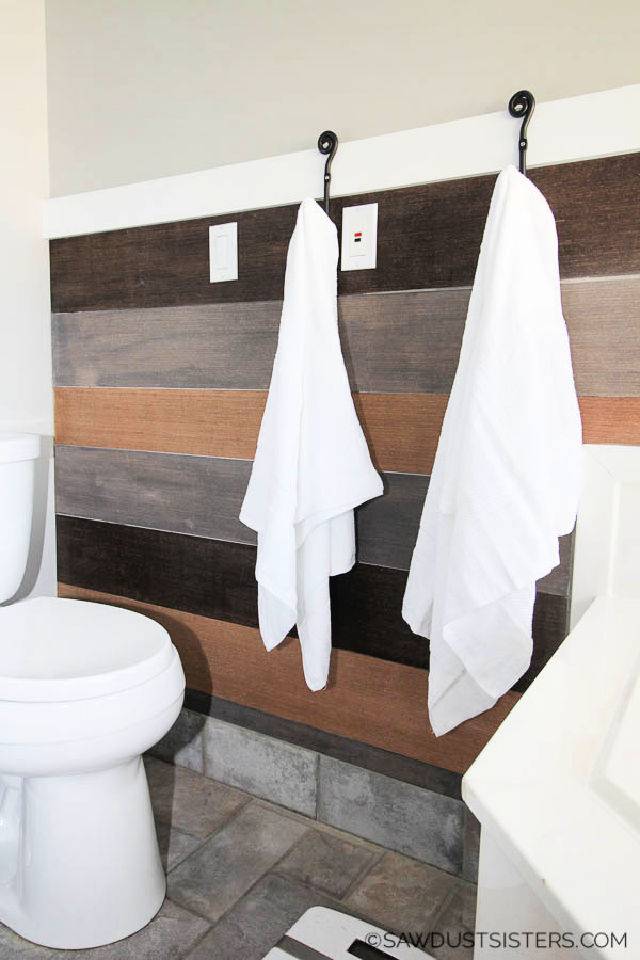
Transform your bathroom with a touch of personal style! Dive into a simple, yet elegant DIY towel rack project, perfect for adding character to any space. Utilizing homemade peel and stick wood planks, this tutorial will guide you through making a modern farmhouse vibe on a friendly budget.
Ideal for refreshing that ’90s master bath or any room needing a decorative lift. Follow step-by-step instructions to achieve this chic look, including tips on making your own stick wood planks to save on costs. Ready to upgrade your space with a creative twist? Learn how by visiting Sawdust Sisters.
8. How to Build a Towel Rack
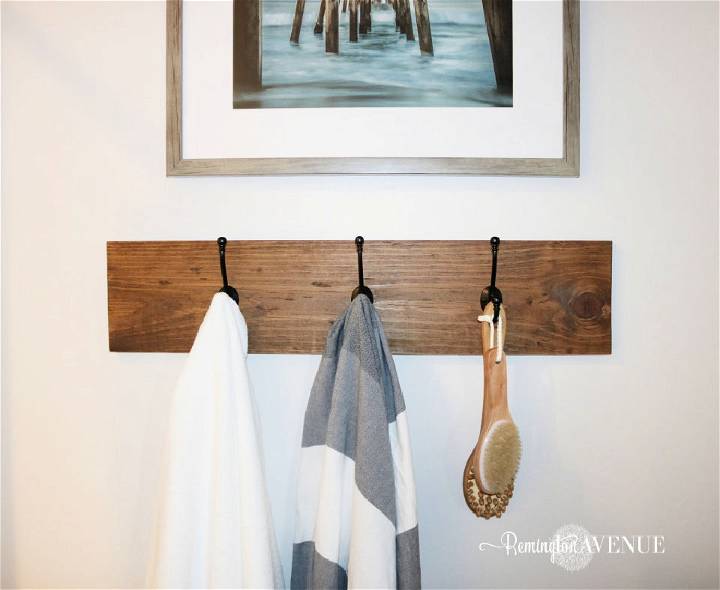
Unlock the potential of your bathroom space with a custom DIY Towel Rack, courtesy of Remington Avenue. Transform leftover wood and a few simple tools into a stylish and sturdy place to hang your towels. This project is not only practical but also adds a touch of personalized charm to your home. Easy to follow steps make this DIY achievable for anyone looking to enhance their bathroom decor. Dive into this creative endeavor and say goodbye to unstable towel racks for good!
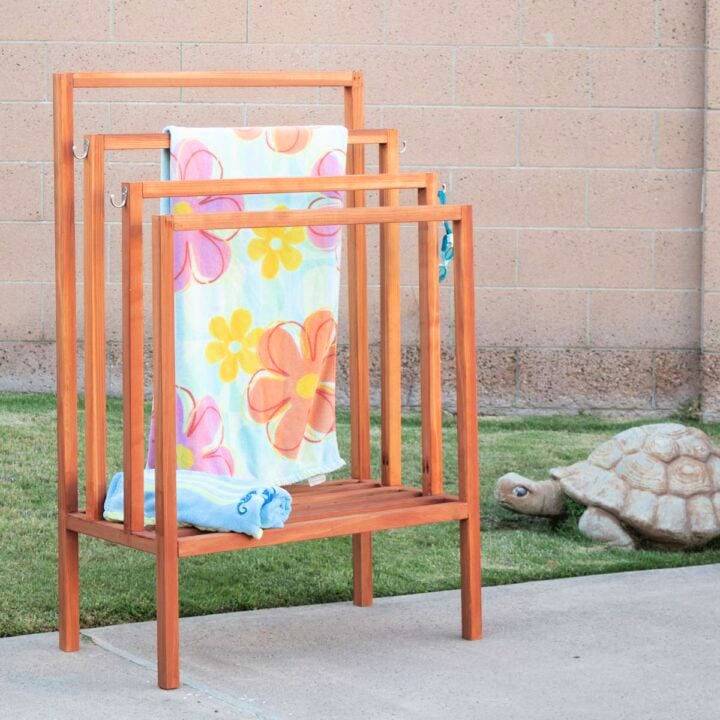
9. Build an Outdoor Standing Towel Rack
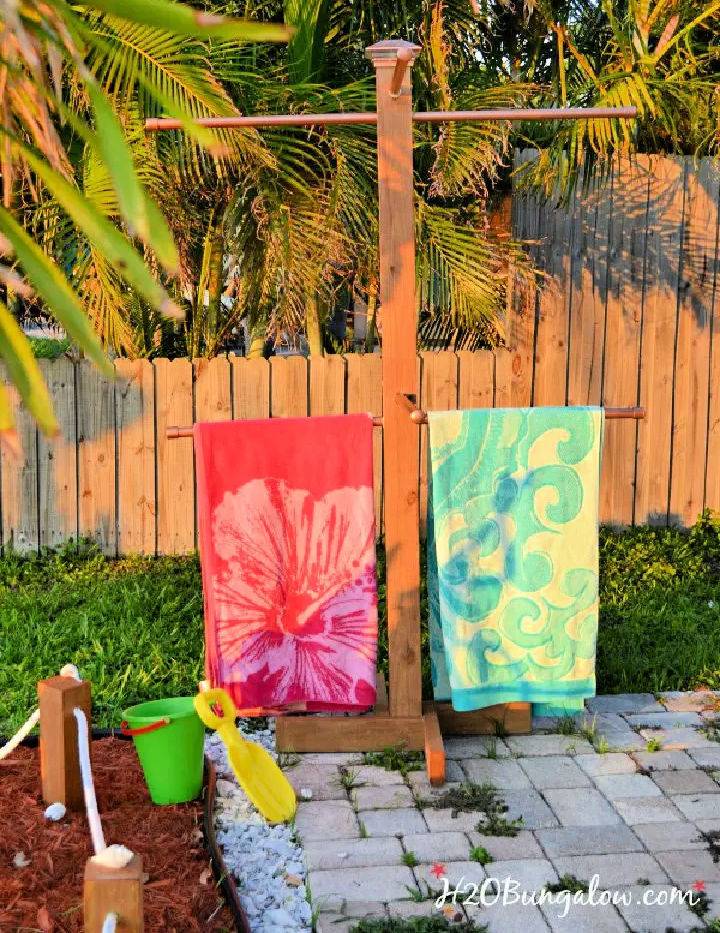
Transform your outdoor area and keep summer essentials organized with this brilliant DIY Outdoor Standing Towel Rack tutorial. Simple to make and immensely practical, this towel rack holds up to eight large towels or swimsuits, making it perfect for pool days or beach outings. Plus, it’s not only functional but also adds a touch of style to your backyard or patio. Dive into this easy-to-follow guide and make managing those wet towels a breeze this summer. Ideal for anyone looking to enhance their outdoor living space!
10. Make a Pallet Towel Rack
Transform your bathroom with this Easy DIY Pallet Towel Rack guide. Say goodbye to messy towel bars and hello to stylish, space-saving towel hooks. This project is affordable, fast, and perfect for anyone looking to organize and add charm to their bathroom. With simple tools and materials, you can craft a rustic, farmhouse, or industrial vibe in no time. Ready to ditch the frustration of towel bars? Let’s start this simple DIY project and elevate your bathroom’s look today!
11. DIY Outdoor Towel Rack Using Pallet
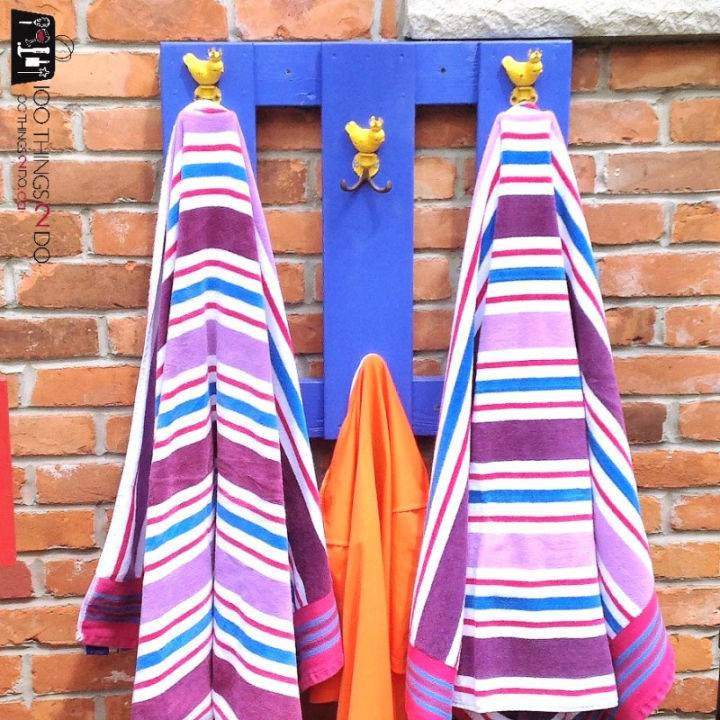
If simplicity and functionality are what you’re after for your outdoor space, look no further. Bringing to you a handy guide to making a DIY pool towel rack that is not only space-saving but also adds a dash of charm. Utilizing minimal materials like a small pallet or basic lumber, some paint, and fun hooks, you can easily craft a durable spot for drying pool towels and swimsuits. Perfect for those with pools or anyone looking to organize outdoor gear, this project promises to be both cost-effective and rewarding. Say goodbye to cluttered towels and hello to a neat and colorful addition to your patio space.
12. How to Make a Horseshoe Towel Rack
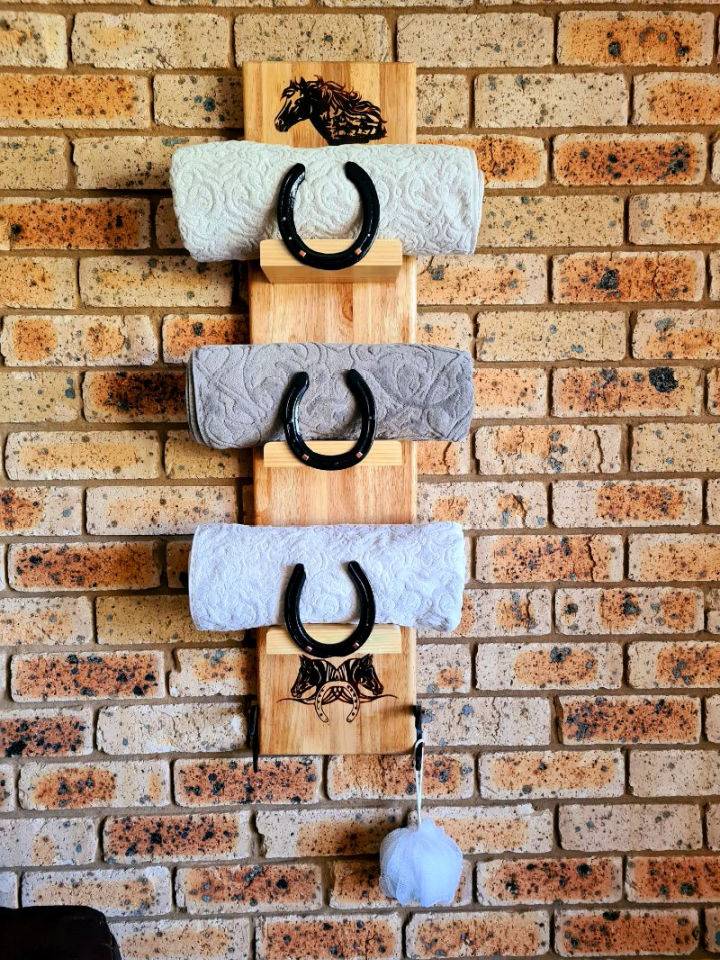
Transform your bathroom decor with a stunning, rustic touch. Learn how to make a DIY Horseshoe Towel Rack through an easy and innovative guide on Unique Creations By Anita. This project is perfect for upcycling enthusiasts and DIYers looking to add a unique element to their home.
From cleaning rusty horseshoes to attaching them to your handmade wooden shelf, every step is made simple and accessible. Plus, discover a no-skill-needed method to add beautiful horse-themed graphics using a scorch pen. Step into a world of creativity and give your bathroom a one-of-a-kind makeover today!
13. Build Your Own Towel Rack
Embark on a creative journey to enhance your outdoor living space with an easy-to-build DIY outdoor towel rack, courtesy of Anika’s DIY Life. This project not only serves as a stylish addition to your patio but also provides a practical solution for keeping towels and swimwear organized. Using redwood or cedar ensures your towel rack withstands the elements, while the detailed plans and video tutorial make assembly a breeze. Perfect for poolside use or after a beach day, this towel rack is a must-have for a clutter-free outdoor area.
14. Building a Wood Towel Holder
Elevate your bathroom aesthetics with a custom DIY Wood Towel Holder. Perfect for those who love to infuse their spaces with warmth and personalized touches. Easy to make and endlessly stylish, this towel holder adds a rustic appeal to any bathroom. For a step-by-step guide on crafting your own, visit Instructables. This project promises to engage your creativity while enhancing the functionality and look of your bathroom.
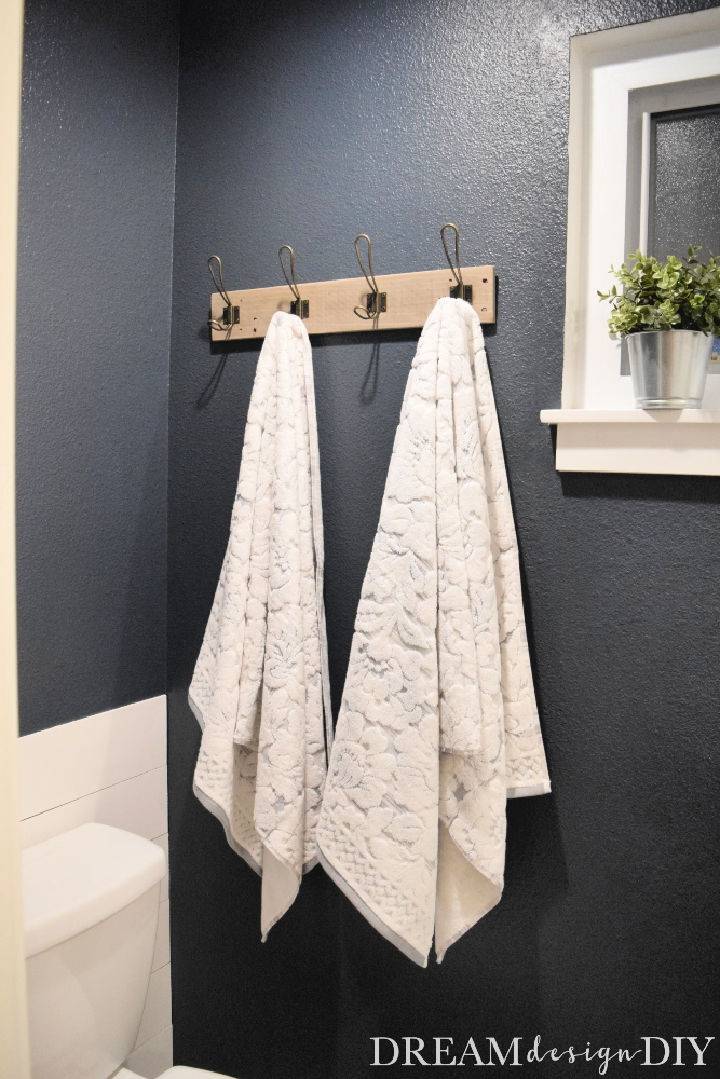
15. Rustic Towel Rack Using Pine Lumber
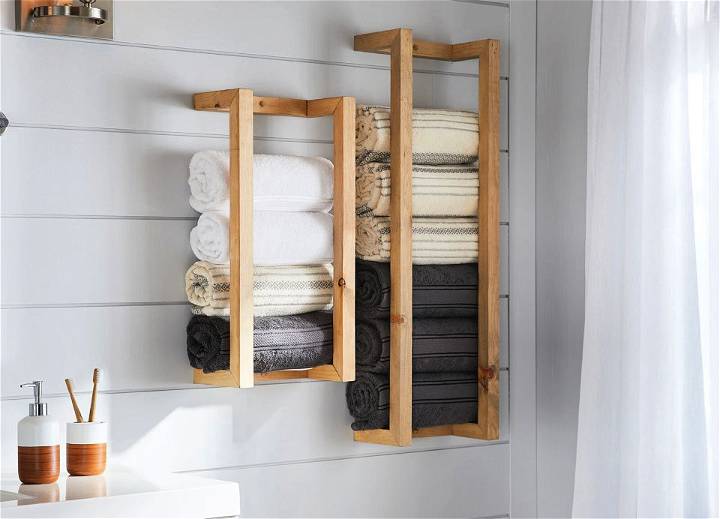
Transform your bathroom with a touch of rustic charm by crafting your own towel racks. Perfect for busy family bathrooms or a luxurious, spa-inspired space, these minimalist DIY towel racks are versatile enough to blend with any décor.
All it takes is some basic pine lumber to make storage that not only looks good but is highly functional, too. Whether you choose to paint or stain them, these racks can be customized to complement your style. Simple, engaging, and wonderfully practical, learn how to make yours today with this straightforward guide from Home Hardware.
16. Simple DIY Brass Hand Towel Holder
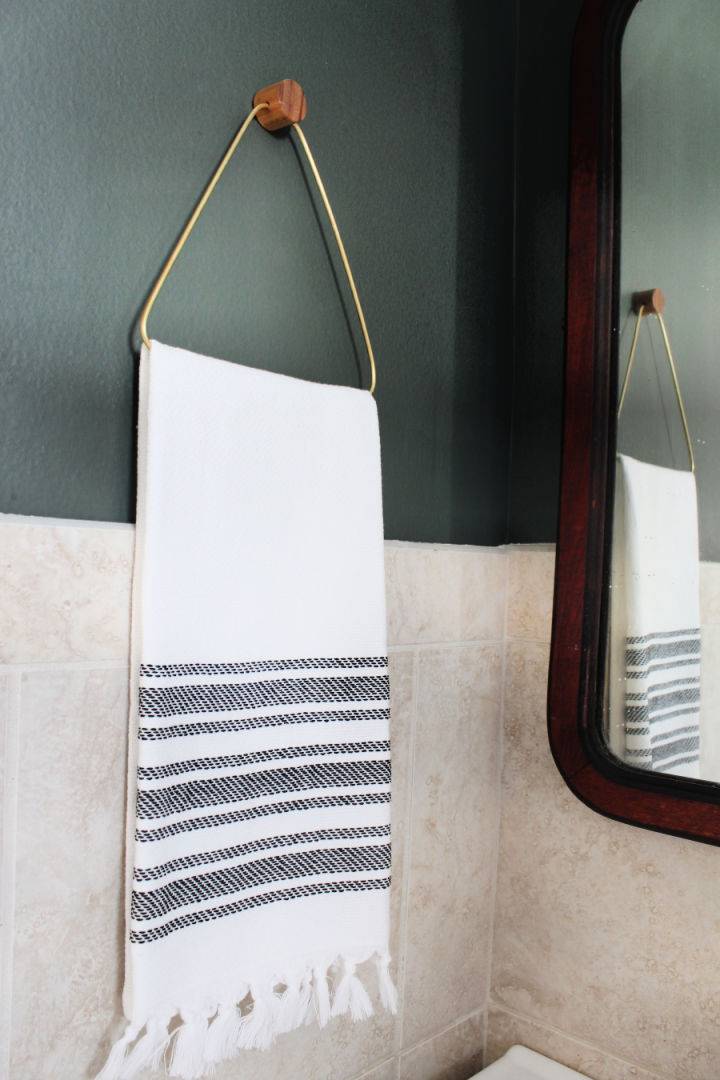
Elevate your bathroom design with a personalized touch by crafting your very own DIY brass hand towel holder. A straightforward project, ideal for those seeking a budget-friendly yet chic accessory to enhance their space. Follow simple steps involving a wooden dowel and a brass rod to make a stylish fixture that adds elegance to any bathroom. Perfect for adding a personal touch to your home decor, this DIY project is both rewarding and functional. For a detailed guide, visit Turning It Home.
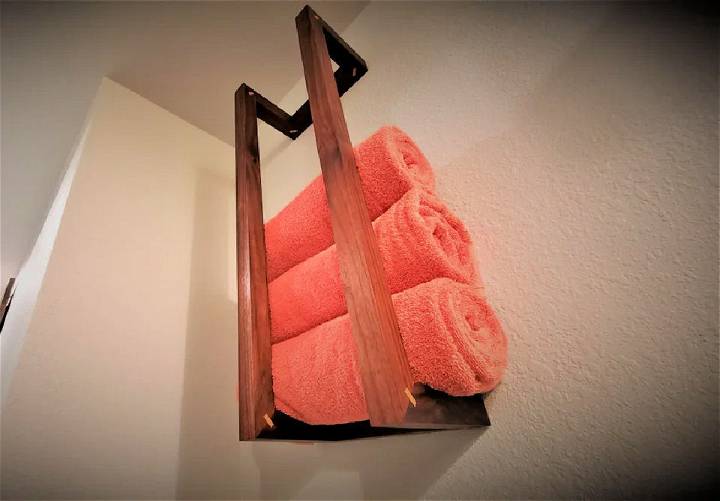
17. Building a Towel Rack With One Board
Elevate your bathroom storage with a chic, handmade touch. Learn how to craft a DIY towel rack with help from Making Manzanita. You just need a single 1×12 board to get started. With free plans and an easy-to-follow tutorial, this project is perfect for adding a custom shelving solution that impressively combines functionality and style. Partnered with Kreg, discover the simplicity of using pocket hole joinery for woodworking. Ready to upgrade your bathroom with this stylish, one-board DIY towel shelf?
18. DIY Copper Towel Rack at Home
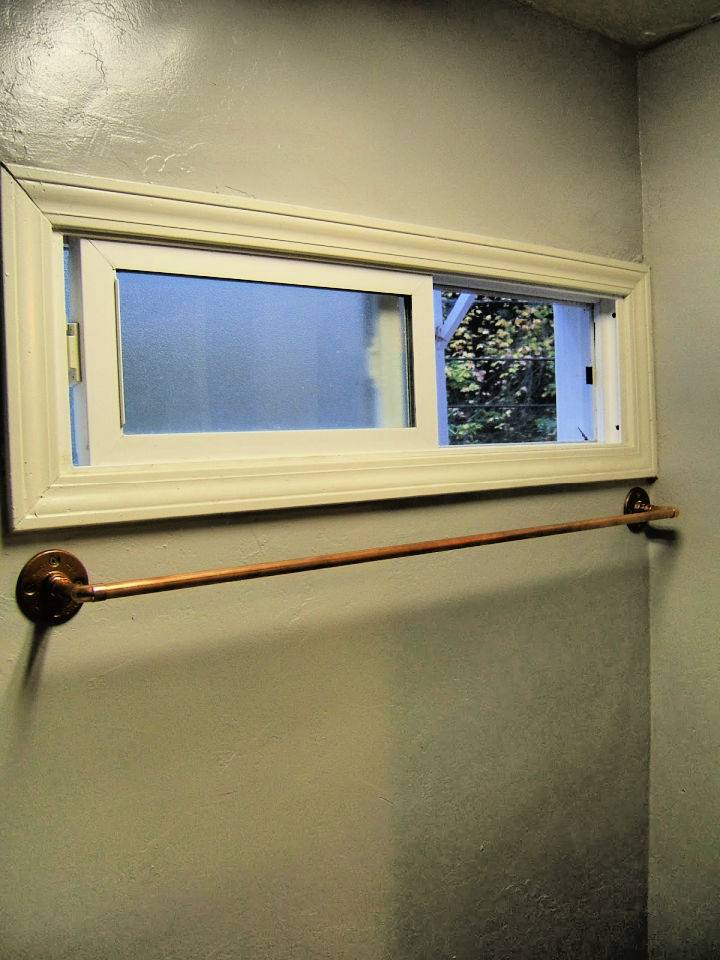
Discover a simple yet stylish DIY project that will enhance your bathroom’s charm—the DIY Copper Towel Rack. Elevate your space with this easy-to-make accessory that adds a unique metallic touch. With detailed guidance provided on NineRed, you’ll find all the steps you need, from materials to assembly, to craft this chic towel rack yourself. Ideal for those looking to infuse their bathroom with a blend of functionality and modern aesthetics, this copper towel rack project promises great results without breaking the bank. Ready to give your bathroom a standout feature? Let’s get started!
19. How to Build a Pool Towel Rack
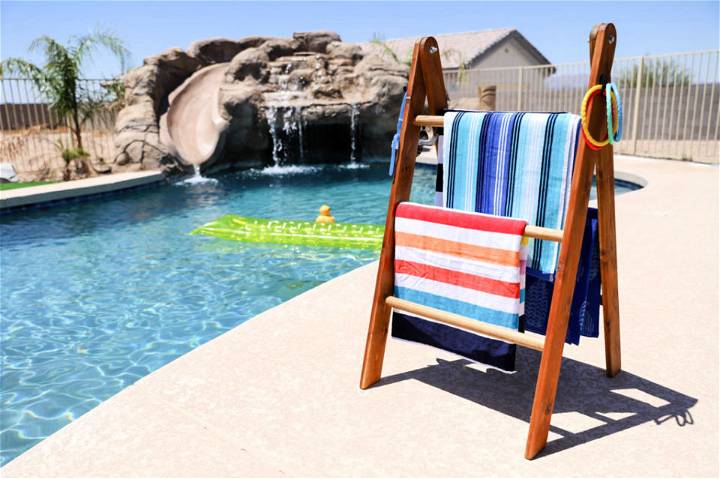
Simplify your summer with an easy-to-follow DIY pool towel rack guide from Addicted 2 DIY. Dive into this beginner-friendly project that uses basic materials and tools. It’s not only a visually appealing addition to your pool area but a practical solution to keep towels organized and dry.
Perfect for those endless days of summer fun, this rack ensures your poolside remains clutter-free. Follow simple steps using cedar boards and pine dowels to make a durable and stylish towel rack. Say goodbye to scattered towels and hello to a neat and inviting pool area.
20. Rustic Towel Rack – Step by Step Instructions
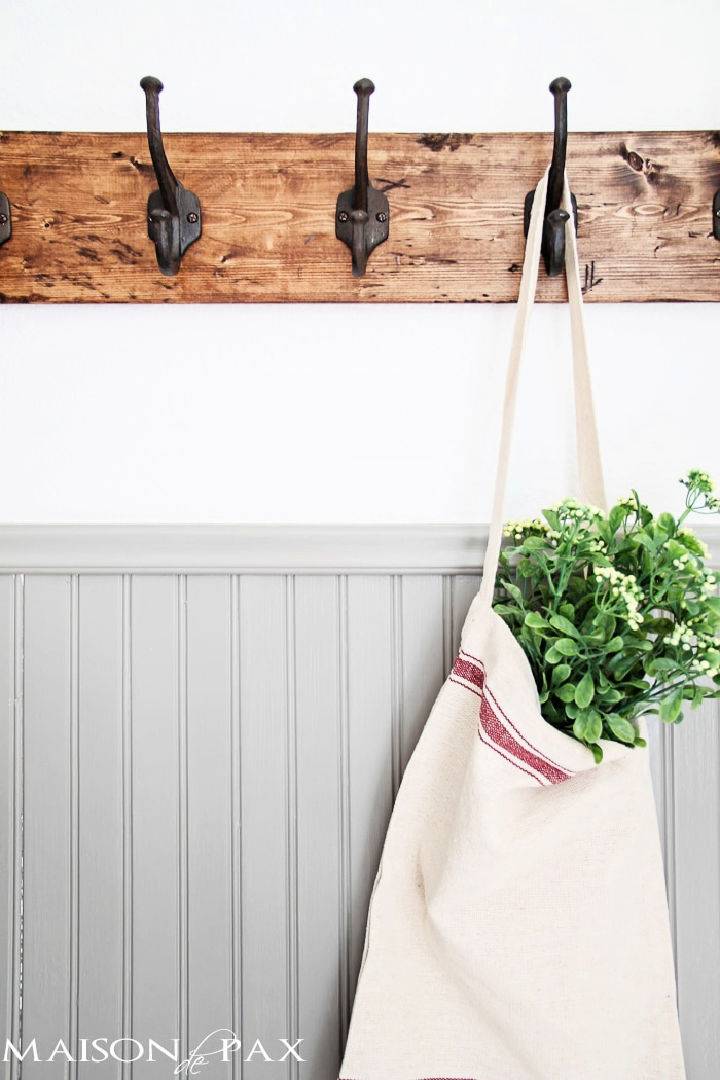
Discover an enchanting tutorial on making a DIY Rustic Towel Rack over at Maison de Pax. This guide isn’t just about assembling a functional item; it’s about adding a personal touch and aesthetic appeal to your home. For a fraction of commercial prices, you can craft a robust, eye-catching towel or coat rack with a distinctly rustic charm.
The process is straightforward, with clear instructions from selecting materials to giving your piece a unique, distressed finish. Perfect for bathrooms, kitchens, or entryways, it’s a versatile project that enhances any room. Ready to transform your space?
21. Handmade Rope Towel Holder
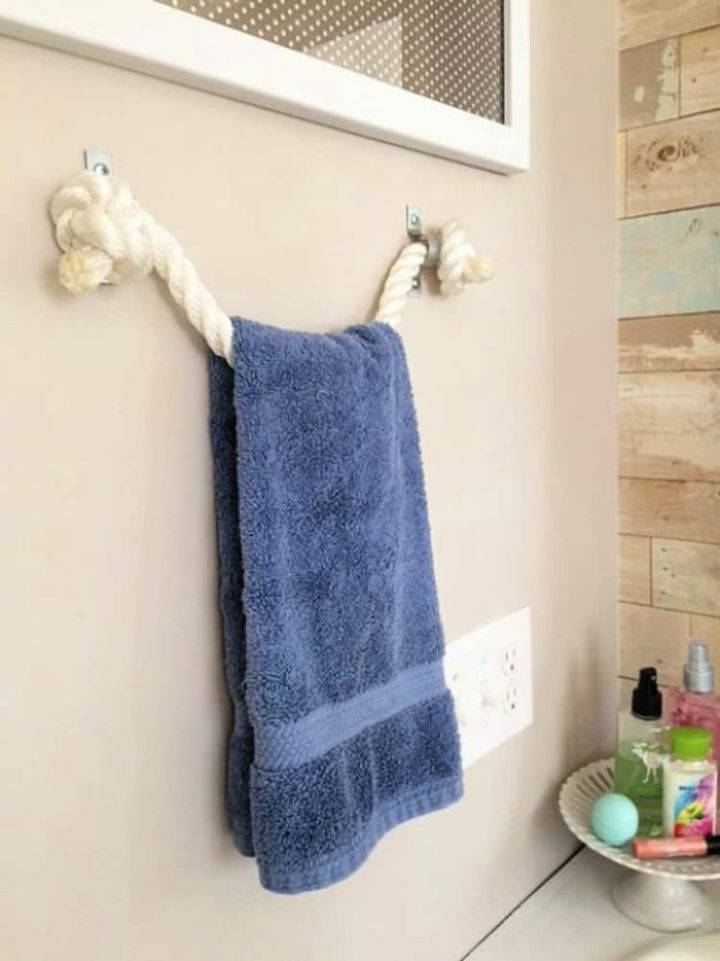
Revamp your bathroom with a touch of nautical charm by making your very own DIY rope towel holder. Perfect for adding a rustic feel, this project is surprisingly easy and adds functionality with style. You’ll need basic materials such as thick nylon rope, sharp scissors or a utility knife, galvanized clips, and a few household tools.
From measuring and cutting the rope to securing it with stylish knots and clips, every step is laid out for a hassle-free DIY experience. Get ready to transform your space and add a personalized touch that’s both practical and visually appealing. For a detailed guide, step over to Greco Design Company and start making your bathroom makeover a reality today!
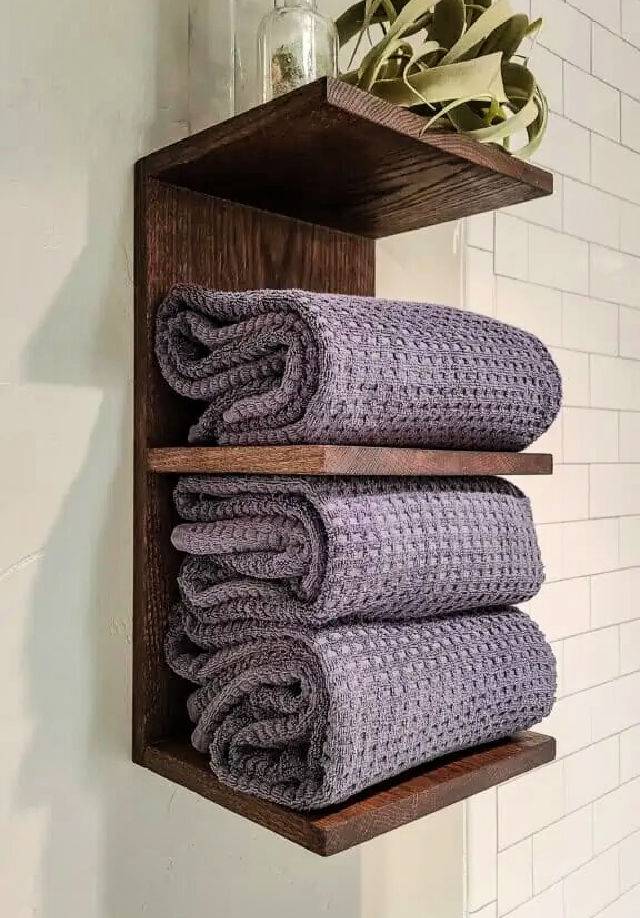
22. Simple DIY Towel Rack With Shelf
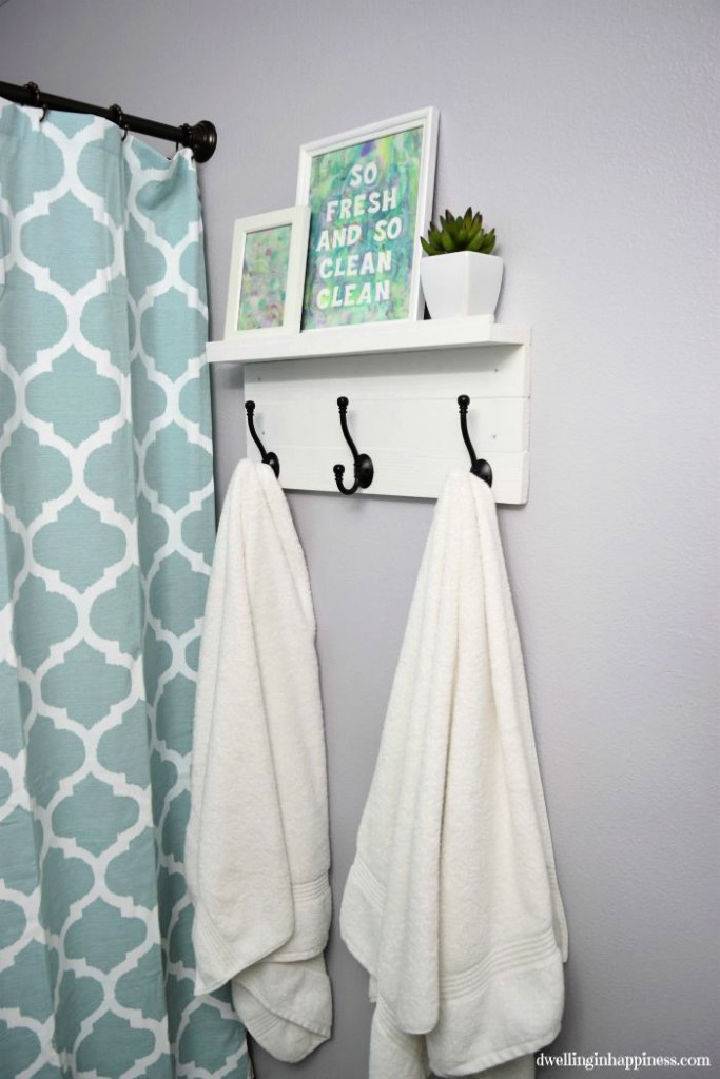
Transform your bathroom with a charming and functional DIY towel rack complete with a useful shelf. Amp up the style and utility of any space effortlessly. This project is a splendid blend of simplicity and sophistication, requiring minimal materials like scrap wood and a dash of creativity. Ideal for displaying decor or keeping towels within reach, this towel rack enhances any bathroom’s aesthetics. Learn how to make your own with detailed instructions at Dwelling in Happiness. Elevate your bathroom decor today!
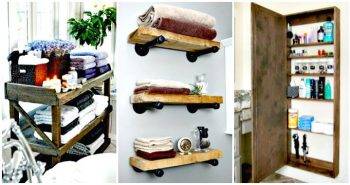
23. Rustic DIY Towel Rack Tutorial
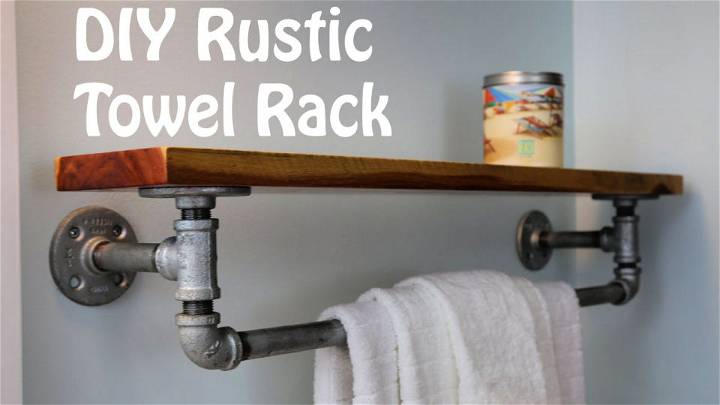
Dive into crafting a unique DIY Rustic Iron Towel Rack and Shelf with an engaging, step-by-step video guide. Learn how to combine iron piping and cedar wood for a charming, rustic addition to your home. Simple tools and materials are used for an approachable project, ideal for enhancing any bathroom or kitchen space.
Find all the details for assembling and finishing this practical and stylish piece by watching the tutorial. Perfect for gifting or personal use, this rack adds a touch of warmth and rustic style. Click here to start your DIY journey.
24. DIY Towel Rack and Bathroom Organizer
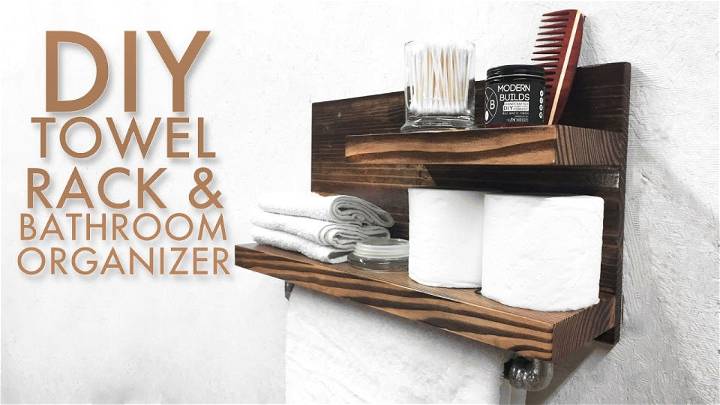
Dive into crafting with a helpful guide that simplifies crochet techniques. Our tutorial provides easy-to-understand instructions, perfect for enhancing your skills. Click here for an informative and engaging crochet tutorial: watch now. Ideal for anyone eager to learn, it offers step-by-step guidance ensuring a rewarding crafting experience. Elevate your crochet creations today!
25. Make a Rustic Farmhouse Towel Rack

Transform your space with a charming DIY Rustic Farmhouse Towel Rack! Perfect for adding a touch of antique elegance to any room, this simple home improvement project can be crafted from just a single two-by-four. Ideal for bathrooms, garages, or poolside, this stylish towel holder is not only functional but adds a warming visual appeal to your home. Follow our easy step-by-step guide on our video tutorial and make a beautiful, rustic addition to your décor today.
Conclusion:
In conclusion, exploring 25 unique DIY towel rack ideas for your bathroom offers a golden opportunity to add a personal touch to your space while ensuring functionality and style. From choosing your style to gathering materials and following our step-by-step guide, crafting your own towel rack can be both a rewarding project and an exciting addition to your home.
Remember to personalize your towel rack to fit your aesthetic and consider eco-friendly options to make your project more sustainable. With these tips and ideas, your bathroom will not only be more organized but also reflect your unique taste and creativity.
Related DIY Ideas to Try:
 30 Unique DIY Bathroom Storage Ideas You Must Try
 25 DIY Bathroom Vanity Ideas (Build with Free Plans)
 25 DIY Bathroom Decor Ideas and Projects to Try
 20 Modern DIY Farmhouse Bathroom Decor Ideas to Try
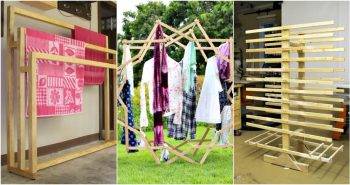 25 DIY Drying Rack Ideas (Indoor and Outdoor)
 25 Homemade DIY Bike Rack Ideas for Garage
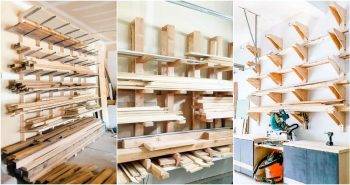 15 DIY Lumber Rack Ideas for Efficient Storage
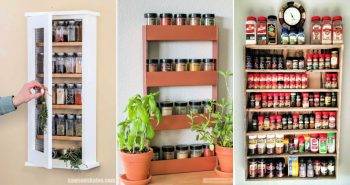 30 Cheap DIY Spice Rack Ideas | Best Way to Organize Spices
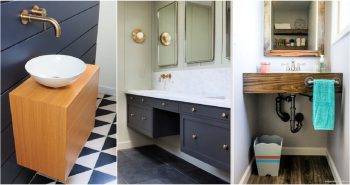 20 DIY Floating Vanity Plans for Your Bathroom to Build
 20 Free DIY Server Rack Plans
 20 Easy DIY Firewood Rack Plans (How to Build)
 30 Unique DIY Wooden Crate Ideas and Decor Projects