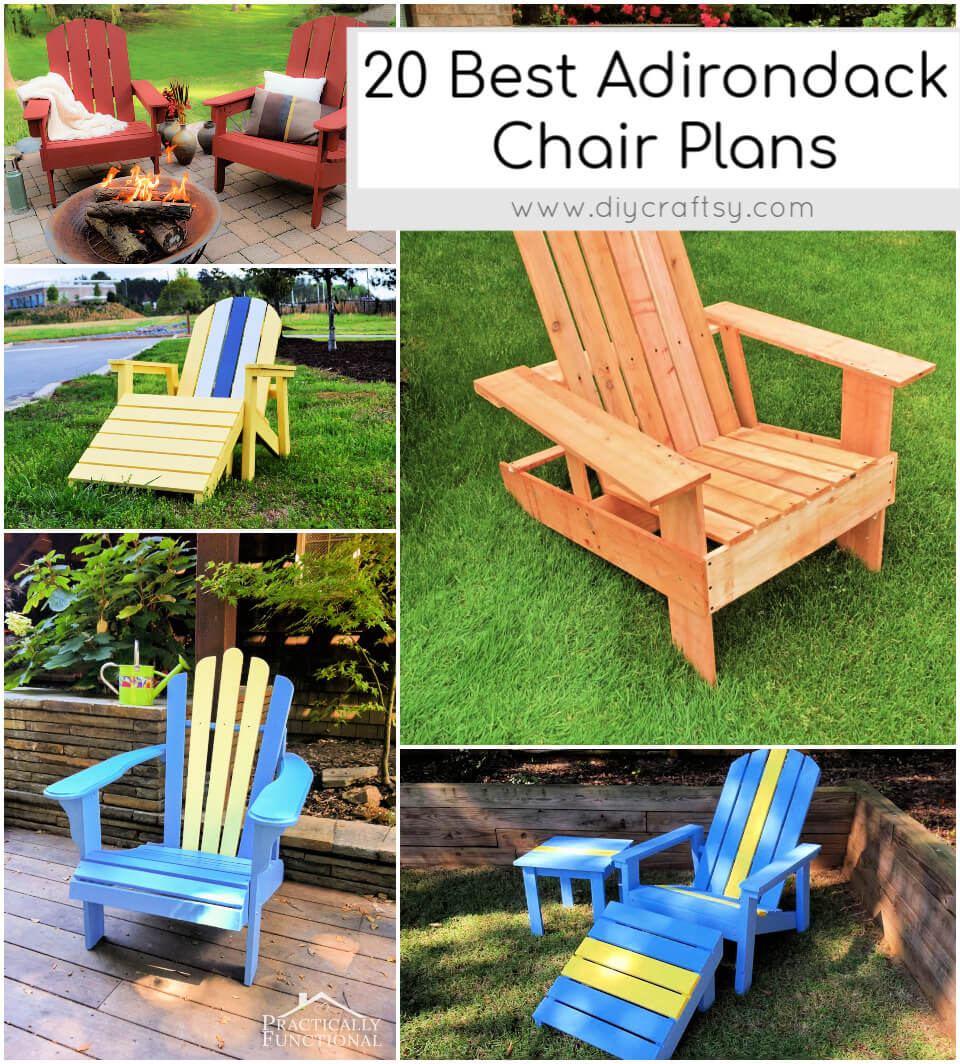
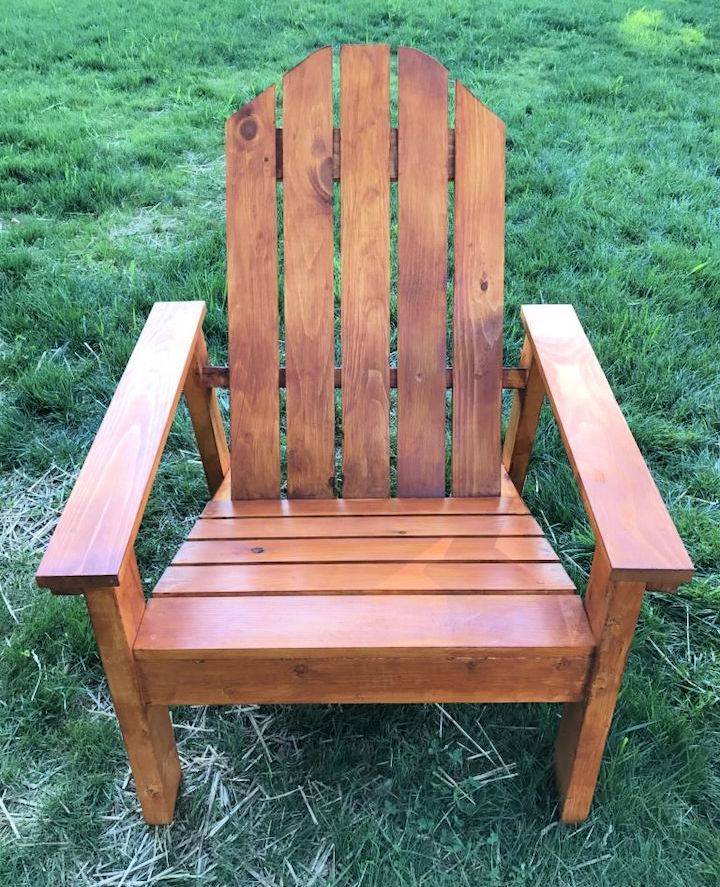
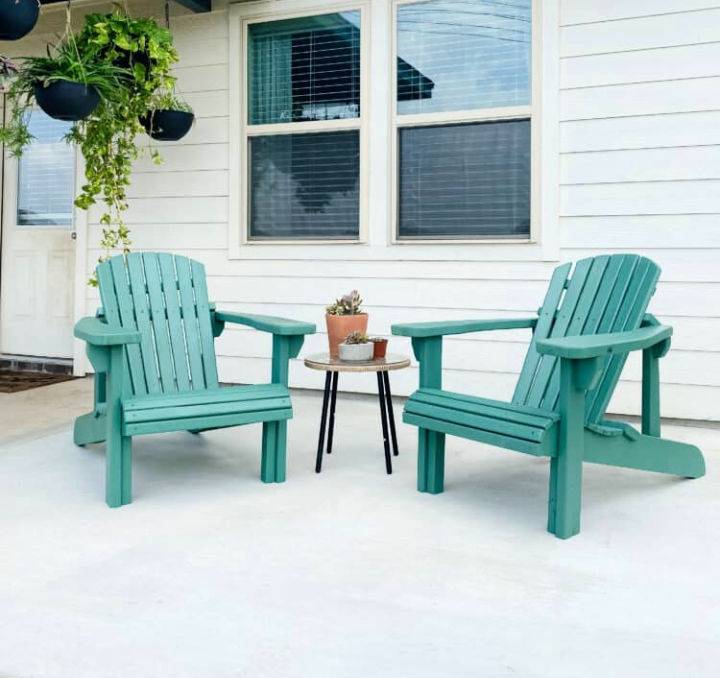
Our collection of these exciting and easy-to-make free Adirondack chair plans is going to make you capable of making outdoor furniture for your home. Everybody loves a hint of comfort in their furniture! Who says that the outdoor furniture has to be all straight away wooden or plastic that you can just hide off in the store? With these best Adirondack chair plans, you are going to want to brag your comfy recliners to the whole neighborhood.
The benefit of DIY wood furniture projects is that it is more durable and sturdy in various weather conditions! But who says it has to be all boring and ordinary chairs? With our selection of Adirondack chairs, you can easily set up some classy and functional outdoor furniture and enjoy the summers and beach days in true comfy spirits!
Adirondack chairs always get your priority when you need to gain a perfect sitting angle to make contact with surrounding nature. Do you need some easy Adirondack chair plans to build one for your garden or backyard? Then you must check out these 20 best Adirondack chair plans that are 100% free and easy to make with free printable and step-by-step instructions!
These free Adirondack chair plans are sure to impress and would make sweet handmade gifts for your friends and family members who are addicted to the outdoors. An Adirondack chair always comes with certain features that provide a great sitting experience! These wooden chairs come with an angled backrest and a tilted berth. Here you are going to see all these features in these DIY Adirondack chair plans.
Try these DIY Adirondack chair plans to make your own!
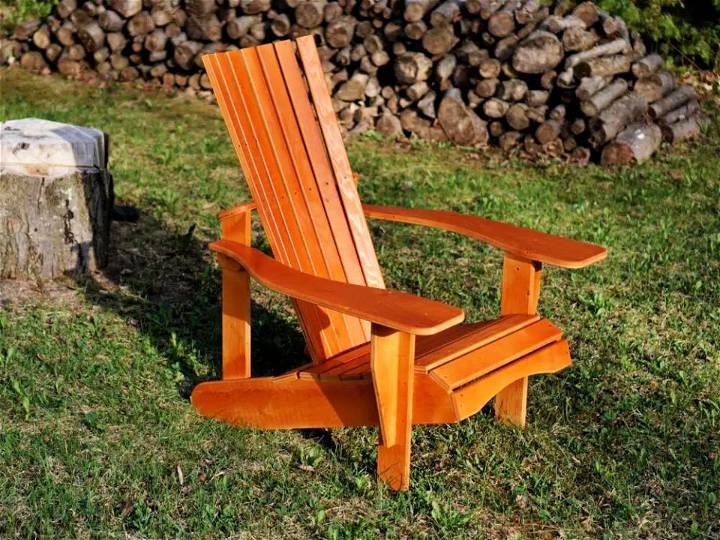
Build the Adirondack chairs with box style legs and then put them together with some matching coffee table and side table! It’ll make perfect outdoor furniture that will rock for making gossips at outdoor. Use the heavy-duty lumber slats to make lovely and solid Adirondack chairs in no time. You can also give amazing variations to your handmade Adirondack chairs using paint, look at the given free Adirondack chair plans that are painted in brick color and will rock for sitting around a fire pit.
Build Adirondack chair sets with matching coffee table and side table that will make a great gift for your outdoor garden. Try to build some raised Adirondack chairs with footrests that will make you sit in a super comfortable way to enjoy the outdoors.
Next, build the giant-sized Adirondack chairs that will create a big focal point at your outdoor and make unique Adirondack chairs with upcycled skateboard backrest and armrests. Browse the entire list of these DIY Adirondack chair plans free and check attached reference links to grab full free plans and how-to tutorials.
After you’ve picked a free Adirondack chair plan from our collection, be sure to peruse our other free woodworking plans including plans on the DIY porch swing, furniture made from pallets, DIY bookshelf, picnic tables, planters, desk plans, TV stands, outdoor bench plans, nightstands, triangle shelf and much more.
How to make your own Adirondack chair?
Our free Adirondack chair plans come in various sizes and versatile designs. If you have already got an Adirondack chair, but it looks boring now, you can even get instructions on how to redo its look by staining it or painting it! With many easy recliner ideas and synchronized tables, our Adirondack chair plans are going to steal your hearts right away!
Oh, and did we mention you might think of these DIY chair plans or construction projects so hard and expect expert skill levels, but guess what folks? That’s not the case at all! Almost all of our Adirondack chair plans are either at moderate skill levels or beginners. So happy summers with these comfy recliners spicing up your outdoor furniture game.
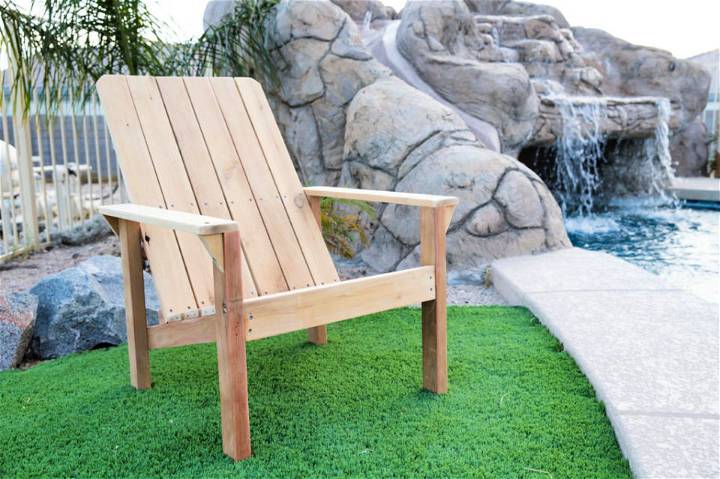
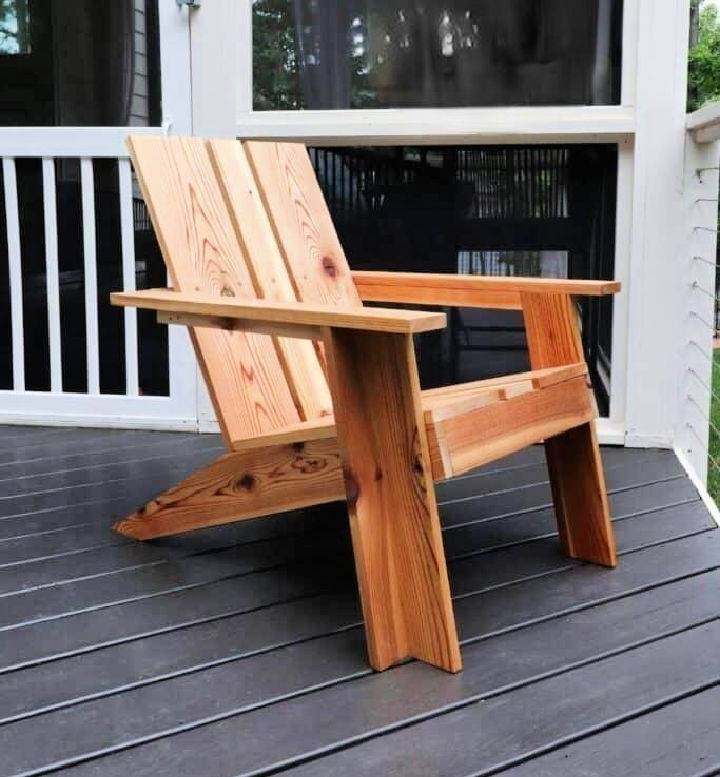
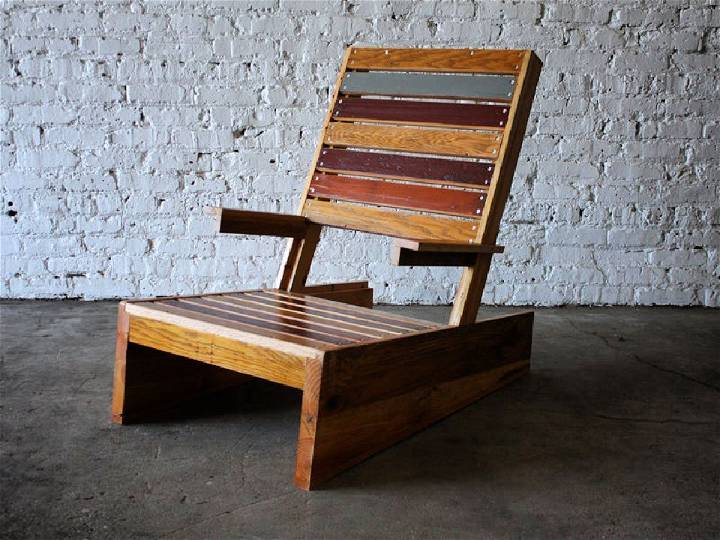
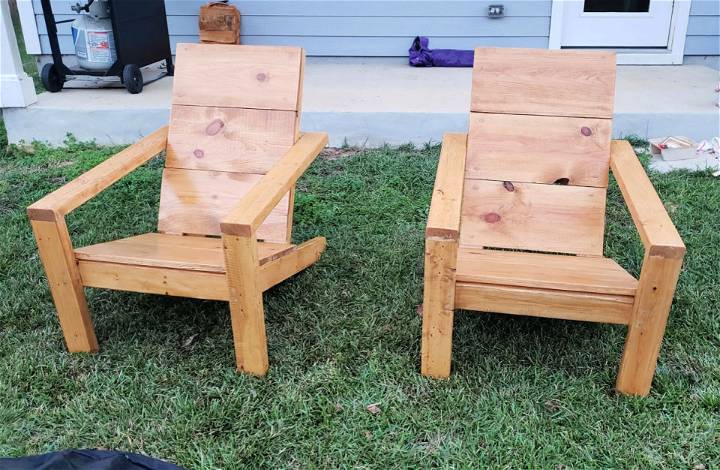
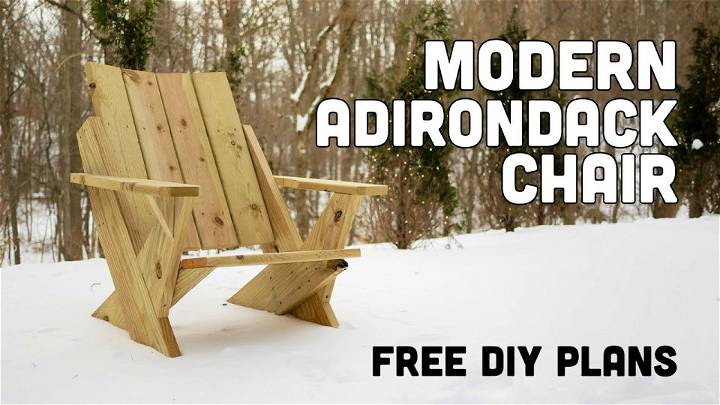
1. Modern DIY Adirondack Chair
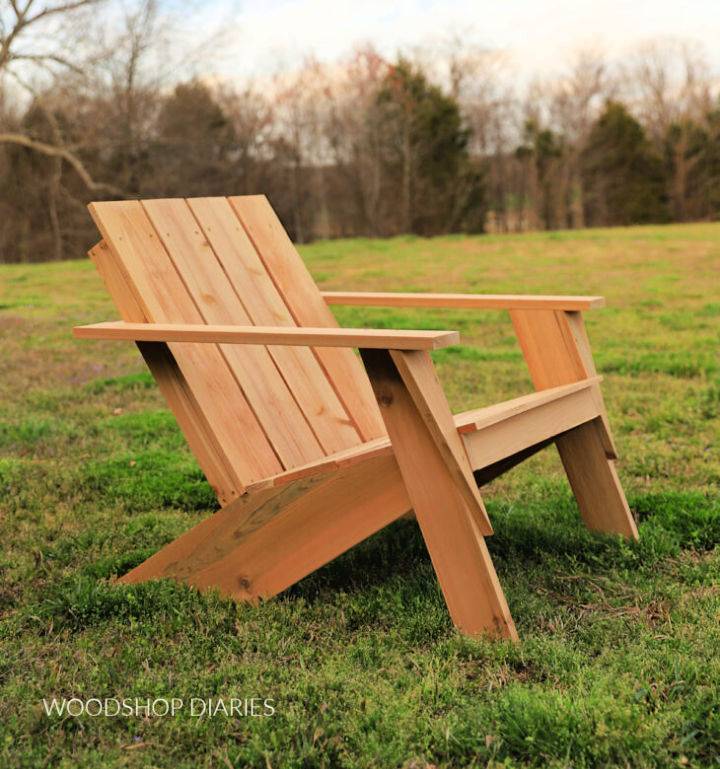
Build a cozy retreat in your backyard with these easy-to-follow DIY Adirondack chair plans, designed for comfort and style. Perfect for lounging by the lake or decorating your patio, these chairs feature a modern twist on the classic design with clean lines and an angled silhouette. Lightweight and portable, you can move them to your favorite spot with ease.
In just a few hours and with basic tools, you can create a durable outdoor chair that’s both beautiful and functional. Discover all the details and step-by-step instructions on how to make your own by visiting Woodshop Diaries. Bring comfort and style to your outdoor spaces today!
2. Ana White’s 2×4 Adirondack Chair
Discover how to give Ana White’s 2×4 DIY modern adirondack chairs a unique twist with Carli’s modifications for vertical slats. In a happy turn of events, a shortage of wood led to an innovative design change that enriched these already stylish outdoor chairs.
Carli guides you through the alteration process, ensuring you can replicate it with ease. From adjusting arm lengths to the final touches of paint, her instructions are clear and straightforward. For those ready to enhance their outdoor living space, visit fwmadebycarli.com for the full tutorial and more.
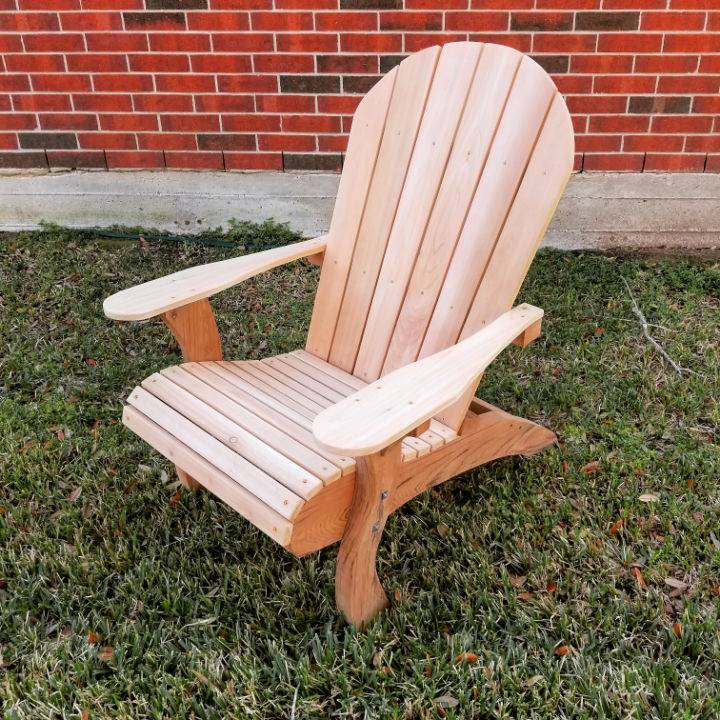
3. DIY Adirondack Chair From One Board
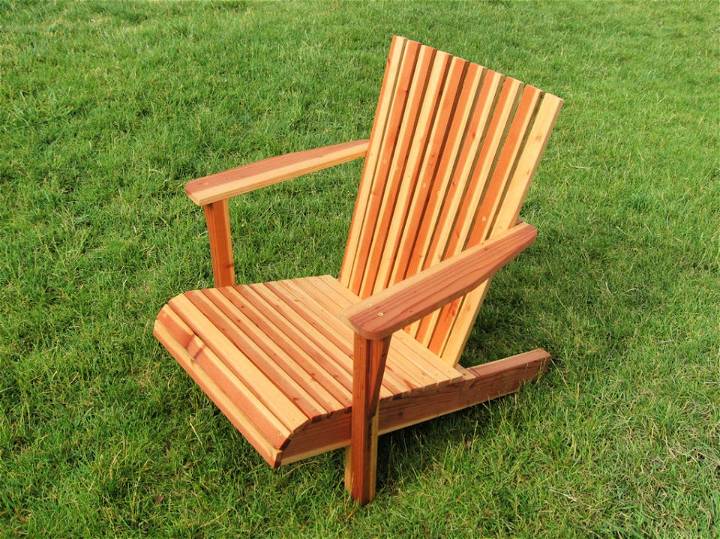
Start building a classic Adirondack chair with a twist using a single board by following a unique DIY guide. This project, outlined in detail on Instructables, shows you how to craft a sturdy, comfortable chair from a 10-foot, 2 by 8 redwood board with minimal waste.
Designed for those with basic woodworking skills, the plan requires simple tools and materials available at your local home improvement store. The step-by-step instructions ensure that you achieve a polished, satisfying result, perfect for any outdoor space. Build your own Adirondack chair today and enjoy the satisfaction of a beautifully handcrafted piece.
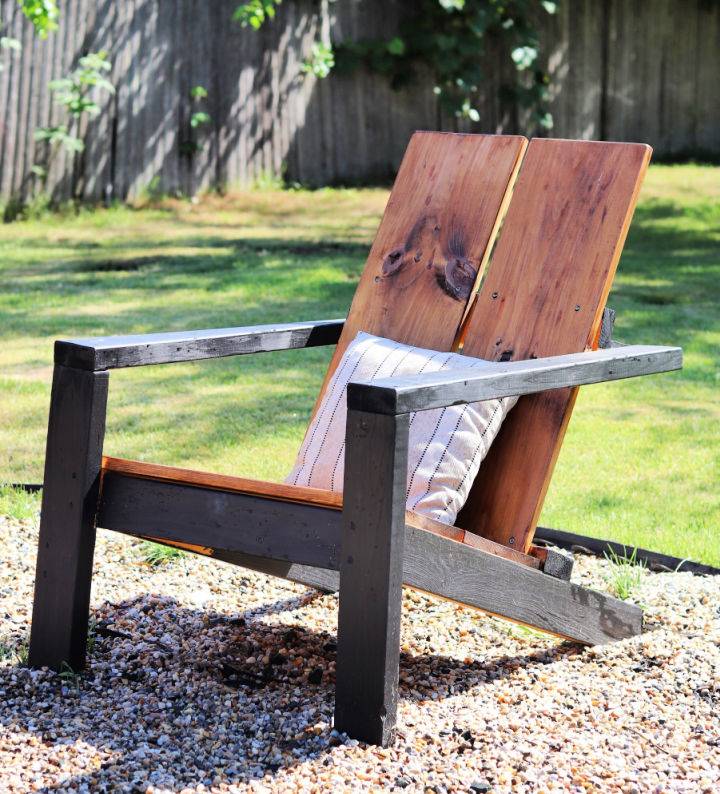
4. Upcycled Adirondack Chair Using Wood
Transform your old outdoor sectional set into a stylish and sustainable Adirondack chair with this easy-to-follow DIY guide. Learn how I took apart our worn-out patio furniture and repurposed the wood for a new project. This creative idea not only saves money but also benefits the environment, aligning perfectly with the spirit of Earth Day. Discover the steps I followed, from disassembling and sanding to reassembling the pieces into a beautiful chair, perfect for lounging around the fire pit or by the pool.
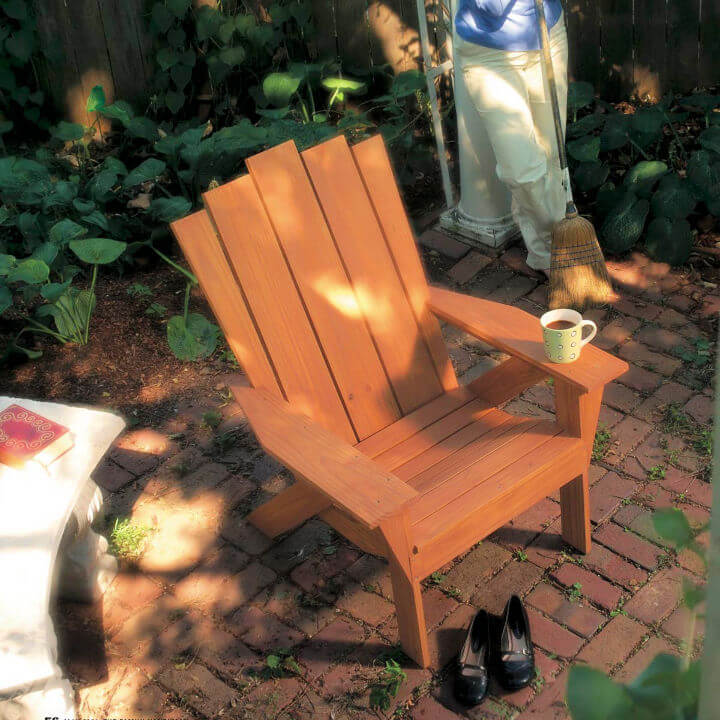
5. How to Build Adirondack Chair
Get the joy of handmade furniture with easy-to-follow Build Your Own Adirondack Chair Plans. Transform spare wood into a charming, rustic Adirondack chair for your garden. This DIY guide caters to all, offering a moderate difficulty level and a chance to repurpose materials, promoting sustainability.
Protect your hearing with recommended PPE during crafting. Invest about 15 hours and a minimal cost for a rewarding output. Enjoy the satisfaction of creating sustainable, personalized garden furniture with this engaging, instructive guide.
6. Easy DIY Wood Adirondack Chair
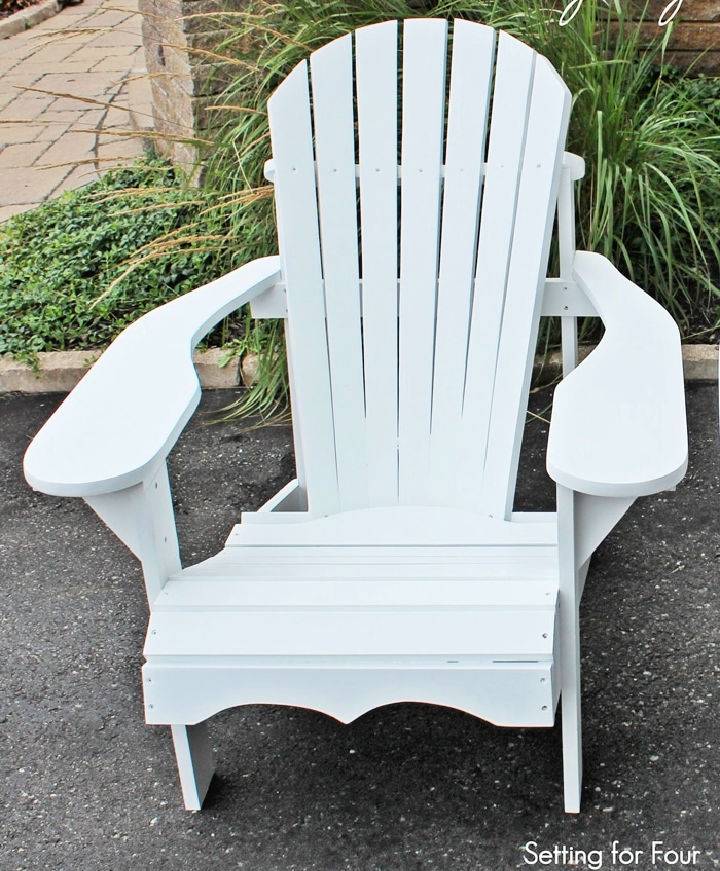
Learn how to build an Adirondack chair with ease and comfort. Follow a simple guide at Setting for Four to construct a DIY wood Adirondack chair in just a weekend. Obtain detailed plans, including a printable template for all pieces, making cutting straightforward.
The instructions also cover materials, a step-by-step process, and color recommendations for a personal touch. Perfect for anyone ready to enhance their outdoor living space, this approachable project promises relaxation in your handmade chair. Ideal for lounging by the fire pit or decking out your patio, these chairs balance comfort with style.
7. Homemade Adirondack Chair From Pallets
Repurpose old pallets into a stylish Adirondack chair with this simple DIY guide from MasterStroke by Resene. With a focus on upcycling, this project is not only environmentally friendly but also a fantastic way to add a personal touch to your outdoor space. For less than $40 (excluding Resene products), you can create a durable and comfortable chair that’s perfect for relaxing in your garden or on your patio.
Follow a step-by-step process including preparing, cutting, and painting the wood, and assembling the chair. Personalize your creation with a choice of Resene paint colors for a unique and vibrant outdoor seating option. For detailed instructions, visit MasterStroke by Resene.
8. DIY Backyard Adirondack Chair at Home
Build your backyard haven with these easy-to-follow Adirondack chair plans from Chisel & Fork. Perfect for novice woodworkers, you only need a miter saw and a jigsaw to create something special. This guide walks you through each step, from cutting the wood to the final staining, ensuring your chairs are both comfortable and durable. Engage in a rewarding experience and add a personal touch to your outdoor space today.
9. Making Adirondack Chair From Scratch
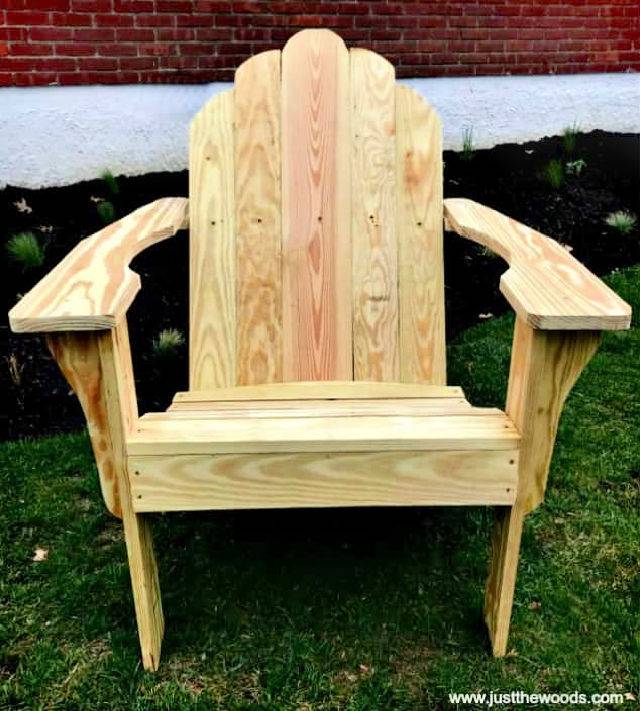
Easily build your own Adirondack chairs with a practical DIY guide from Just the Woods. Building these classic, comfortable outdoor chairs yourself not only saves money but also adds a personal touch to your garden or patio. The guide provides you with detailed Adirondack chair plans, a comprehensive list of materials and tools needed, and step-by-step instructions on assembly.
Perfect for anyone looking to enhance their outdoor living space, this tutorial ensures your DIY project leads to sturdy and inviting seating you’ll be proud to show off. Whether for relaxing sunsets or lively backyard gatherings, your new Adirondack chairs will be the highlight.
10. How to Make a Plywood Adirondack Chair
Learn how to craft two elegant Adirondack chairs from just a single sheet of plywood with this insightful guide. By splitting a sheet of 3/4″ exterior grade plywood into manageable pieces, you can replicate the traditional Adirondack style without sacrificing aesthetics or durability. The process involves precise cuts, curve drawings using simple tools, and assembly with construction adhesive and wood screws for a sturdy build.
Each step, from creating pilot holes to applying a protective stain, ensures your chairs not only look great but last for years. For detailed instructions and downloadable SketchUp models, visit iBuildit.ca. This project makes for an engaging and rewarding woodworking task, yielding beautiful outdoor seating with minimal waste.
11. DIY Outdoor Adirondack Chair From Skis
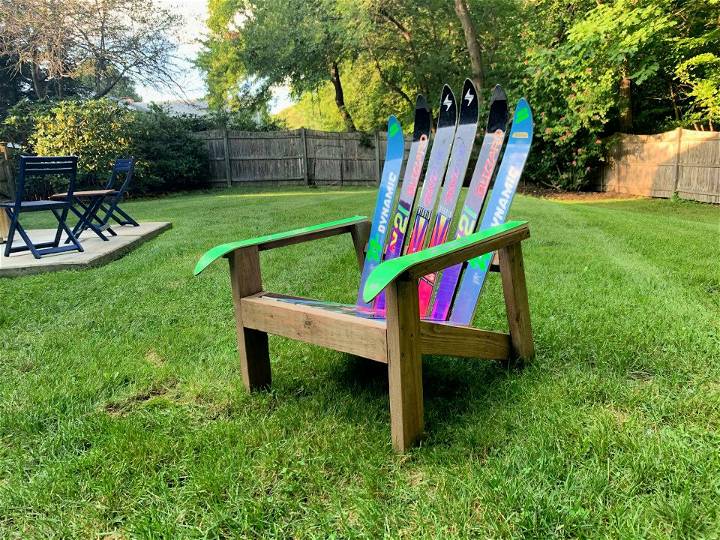
Transform your old skis into a stylish and durable outdoor Adirondack chair with this engaging guide. Perfect for ski enthusiasts wanting to repurpose their gear, our instructions outline the process, detailing materials needed like pressure-treated 2x4s, Spax screws, and the right saw blade. Starting with a solid base, learn to customize ski lengths for the chair back and seat, ensuring a comfortable and unique piece for your outdoor space.
Navigate through cutting and assembling challenges with handy tips, including the use of specialized drill bits for smooth construction. For an in-depth tutorial, visit RockyCanyonRustic. Discover the satisfaction of crafting your ski chair, a conversation starter that combines functionality with personalized flair.
12. Make Your Own Adirondack Chair
Discover the charm of building your own Adirondack chair with a step-by-step DIY guide found at Imgur. Perfect for those looking to add a personal touch to their outdoor spaces, this tutorial offers clear, concise instructions. You’ll learn how to assemble, seal, and possibly adjust the seat slats to ensure the perfect curve. Ideal for enhancing your patio or garden, creating a durable and comfortable seating option has never been more accessible.
13. Building Your Own Adirondack Chair
Upgrade your outdoor space by building a sleek, modern Adirondack chair with this straightforward DIY guidance. Ideal for those seeking to enjoy their garden or patio, this Adirondack chair combines both comfort and contemporary design.
Not only will you save money by making your own, but you’ll also get the satisfaction of crafting something special for your home. With a focus on a relaxed seating angle, you’ll have the perfect chair for gatherings or solo relaxation. For a full guide on creating this stylish piece, visit Pine and Poplar.
14. How to Make Your Own Adirondack Chair
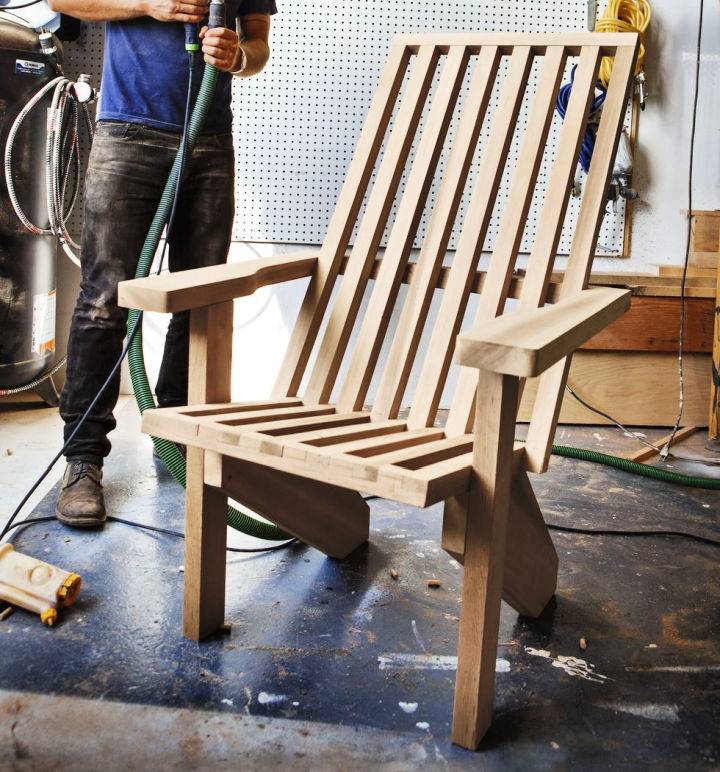
Elevate your outdoor seating with a challenge that’s both rewarding and stylish. Building a modern DIY Adirondack chair, as detailed in a fantastic guide by Popular Mechanics, combines craftsmanship with a sleek, modern design. This DIY project goes beyond the traditional, incorporating a slat design that promises comfort and durability.
With comprehensive instructions, including material lists and tool recommendations, even those new to woodworking can achieve great results. Prepare to invest time and effort, but the reward is a bespoke piece that elevates any outdoor space.
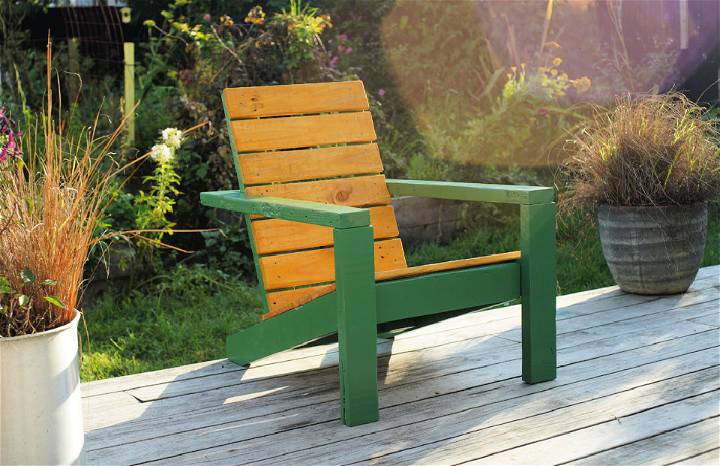
15. 2×4 Adirondack Chair Building Plan
Start building an Adirondack chair that combines affordability, durability, and comfort with these precise plans. Utilizing 2x4s for the structure, not only reduces the cost but also boosts the chair’s robustness, making it a project that’s simpler to construct without compromising on the deep recline that defines Adirondack comfort.
For those looking to add an extra touch of relaxation, there’s an optional footstool plan available to complement your chair. Learn all the tips for finishing your outdoor furniture to ensure it stands the test of time. For detailed instructions and to start your project, visit Ana White’s website.
16. DIY Adirondack Chair – Step-by-Step Instructions
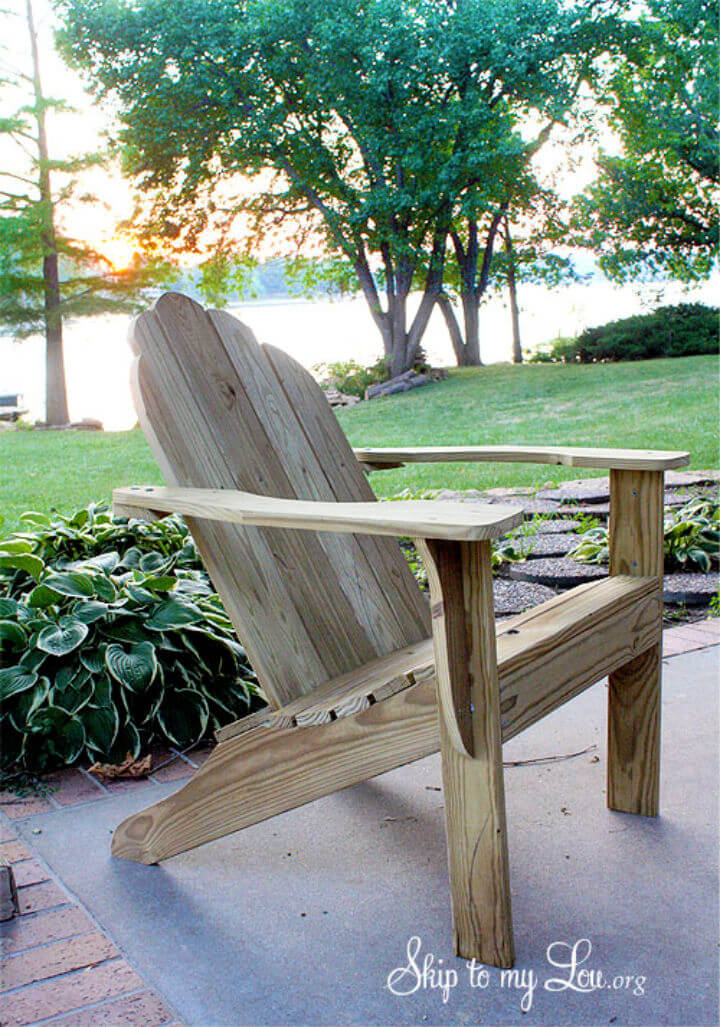
Enhance your outdoor living space by building your very own Adirondack chairs using these free downloadable plans from Skip to My Lou. Ideal for any backyard, porch, or patio, these chairs are not only a statement of style but also offer the perfect spot to relax.
With simple-to-follow instructions and a comprehensive materials list, you’re set for a successful DIY project. The plans require minimal measuring, making it easier for family members of all ages to participate in the building process. Gather your tools, download the template, and embark on a delightful project to create seating that blends comfort with timeless design.
17. How Do You Make an Adirondack Chair
Find the secret to crafting comfortable outdoor seating with this DIY guide on building your very own Adirondack chair and loveseat. Perfect for anyone with intermediate DIY skills and a budget between $51 to $100, this project is not just budget-friendly but also designed for ease of assembly.
Constructed from cost-effective, durable wood, these pieces can be stained to reveal a stunning finish, transforming your outdoor space. Armed with simple tools like a circular saw and drill, follow this step-by-step guide to create furniture that combines beauty with functionality. For a detailed walkthrough, visit Family Handyman.
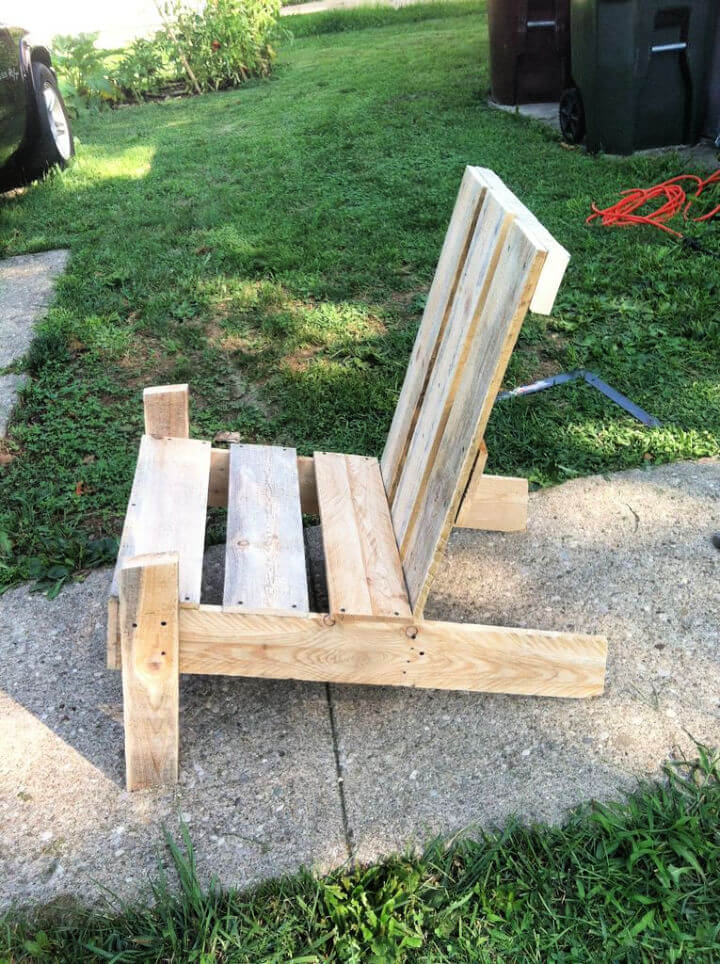
18. Simple DIY Scrap Adirondack Chair
Revitalize your outdoor seating with a sustainable twist by building your scrap Adirondack chair. This DIY project not only promotes eco-friendliness by repurposing leftover wood but also adds a modern, rustic charm to any space. Ideal for decks, cabins, or poolside areas, the design features a simple wooden wedge with a comfortable angled back.
Utilizing materials such as old-growth Douglas Fir and assorted shop scraps, this chair is both durable and visually appealing. With a breakdown design for easy storage, it’s a practical addition to your outdoor furniture collection. Visit Instructables for the full guide. Equip yourself with basic tools and get started on this engaging project today!
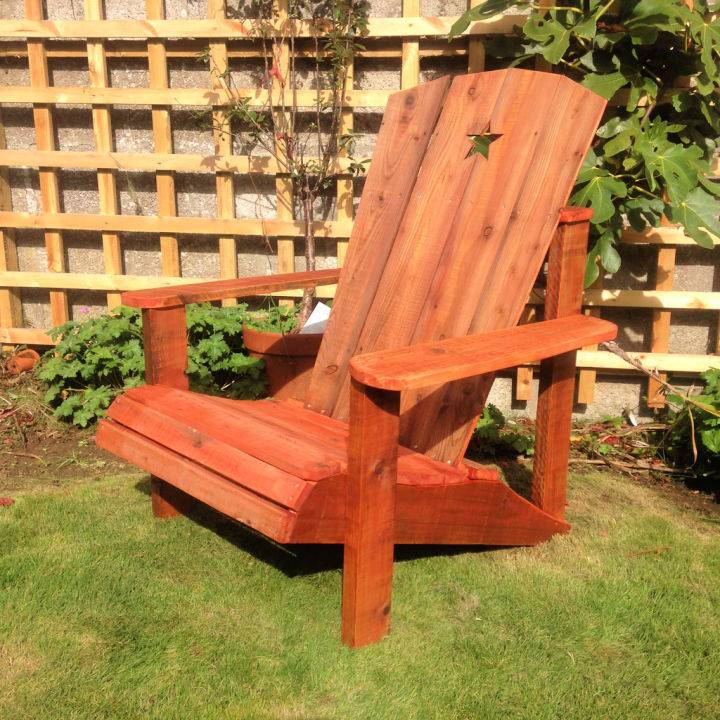
19. Best DIY Adirondack Big Chair

Build a backyard centerpiece with the Big Chair DIY guide. Offering a step-by-step DIY walkthrough, this project brings both fun and challenge to your crafting adventures. While it’s not a blueprint, this guide lays out materials, cuts, and assembly tips to sculpt your giant Adirondack chair.
Note: adjustments and fine-tuning are part of the process, ensuring a unique creation. Review the guide thoroughly, twice if needed, and get ready to make a statement in your outdoor space. Happy building!
20. How to Build Pallet Adirondack Chair
Uplift your backyard with a sustainable pallet Adirondack chair by following a simple and budget-friendly DIY guide on Instructables. Ideal for both novices and seasoned DIY enthusiasts, this tutorial breaks down how to repurpose pallet wood into a stylish and comfortable outdoor chair. The instructive and engaging steps ensure you create a durable piece, perfect for lounging during those long summer days. Elevate your outdoor space with this eco-friendly project today.
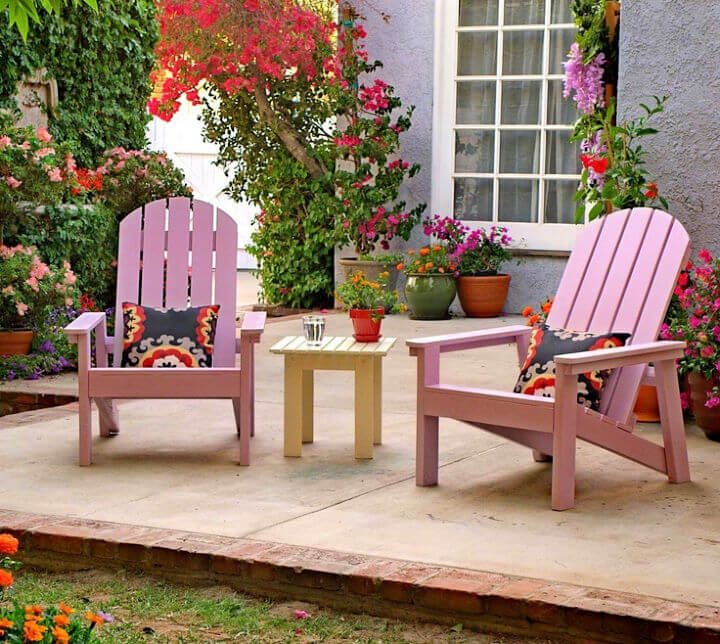
21. Make a Painted Adirondack Chair
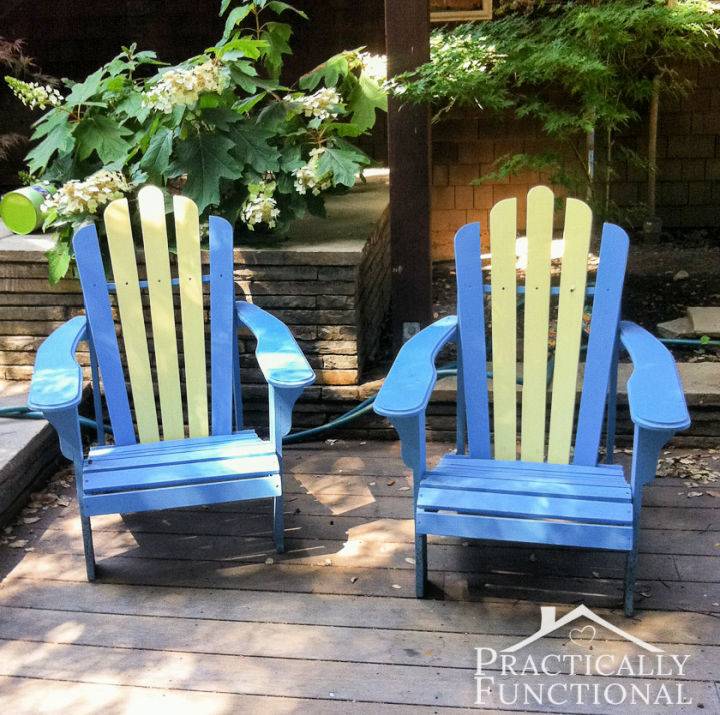
Begin your outdoor makeover by painting Adirondack chairs for a unique and colorful addition to your patio or garden. At Practically Functional, you’ll find an easy-to-follow guide that breaks down the whole process into simple steps. Start with sanding your chairs for a smooth base, then apply primer to ensure the paint adheres well and lasts longer.
Choose vibrant exterior paints to bring your creative designs to life, applying two coats for an even and resilient finish. Whether you’re refreshing old chairs or personalizing new ones, this project is perfect for adding a personal touch to your outdoor space. Let’s grab our brushes and make our gardens a haven of color and comfort!
22. DIY Adirondack Chair With Details Instructions
Build stylish, durable outdoor seating with a guide on crafting DIY modern Adirondack chairs. Perfect for those with limited woodworking experience, this project ensures comfort and affordability, being achievable under $100.
If tools are at hand, costs could dip to around $40 per chair. Find comprehensive steps, tool lists, and tips to navigate through your first chair-making journey with ease. For detailed instructions and free plans, visit Change N Focus. Happy building!
23. Make Your Own Adirondack Chair
Uplift your outdoor space with easy-to-follow DIY Adirondack chairs using a detailed template and plan from Love & Renovations. Even if you’re new to woodworking, this project is surprisingly simple and results in high-quality, durable chairs perfect for any backyard.
The plan covers everything from material selection to assembly, ensuring a smooth DIY experience. With the option to add a matching footstool and side table, you’ll have a complete set to enjoy. Ready to give your patio a personal touch? Start building your own Adirondack chairs today.
24. Handmade Adirondack Chair Tutorial
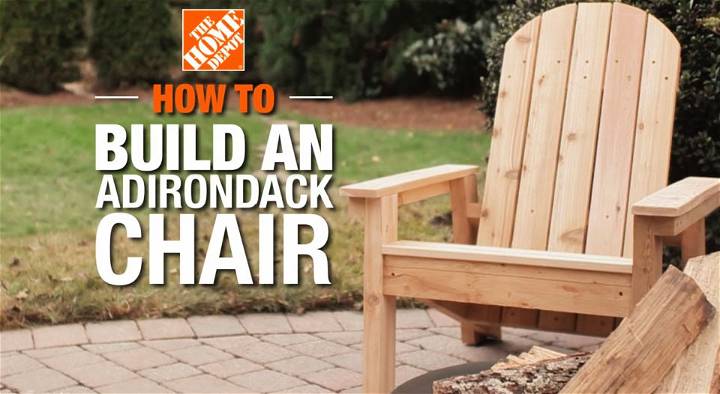
Learn how to build your own Adirondack chair with a helpful DIY guide from The Home Depot. This classic outdoor furniture piece is surprisingly simple to make. All required tools and materials are listed towards the video’s end.
Follow straightforward steps for cutting boards, assembling legs and back, and attaching slats and armrests. With practical tips on avoiding wood splits and ensuring sturdy construction, you’re well on your way to adding a charming touch to your outdoor space. Finish with your choice of paint or stain for a personalized look.
25. Free Adirondack Chair Plan
Construct a stylish, modern Adirondack chair with these free plans. This DIY tutorial simplifies the process, making it possible within about an hour. It guides on cutting wood correctly and assembling the parts for a durable and comfortable seat.
Tips for customizing the chair to enhance its comfort and aesthetic are included. Perfect for DIY enthusiasts who love outdoor furniture projects that combine functionality with straightforward elegance. Secure the instructions now and create a comfortable backyard retreat.
Related DIY Ideas to Try:
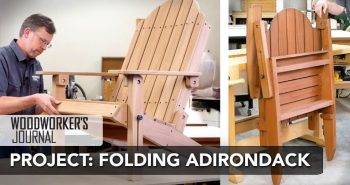 5 Free Folding Adirondack Chair Plans
 Free DIY 2×4 Adirondack Chair Plans: How to Build
 How to Upcycle Old Chair: What to Do with An Old Chair
 25 Easy to DIY Swing Ideas & Plans (Bed, Chair, Bench)
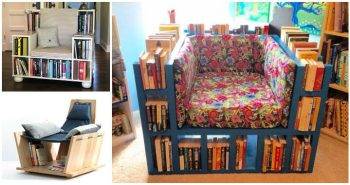 5 DIY Bookshelf Chair Plans (Learn How to Build)
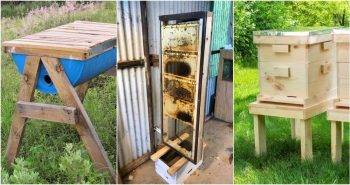 25 Free DIY Beehive Plans – Build Your Own Beehives
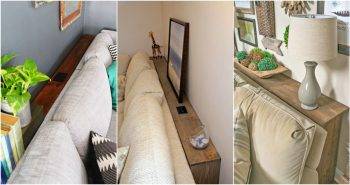 25 Free DIY Sofa Table Plans or Behind the Couch Table
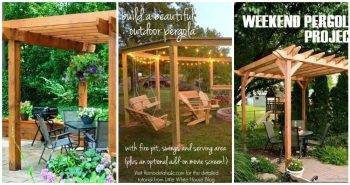 25 Free DIY Pergola Plans (Learn How To Build a Pergola)
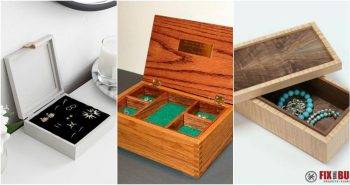 20 Free DIY Jewelry Box Plans
 30 Free DIY Step Stool Plans for Every Need
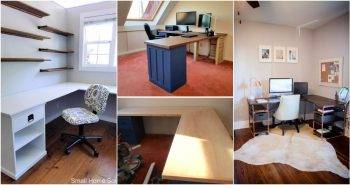 25 Free DIY L Shaped Desk Plans (How to Build)
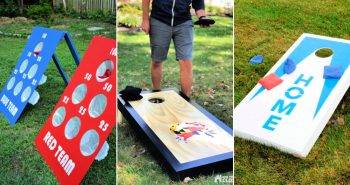 30 Free DIY Cornhole Board Plans and Ideas to Build